
Upgrading to LED headlights is one of the best visibility improvements you can make — but to get the most out of them, they need to be aimed correctly. Properly aimed headlights maximize your visibility without blinding oncoming traffic. This guide walks you through the full aiming process step by step.
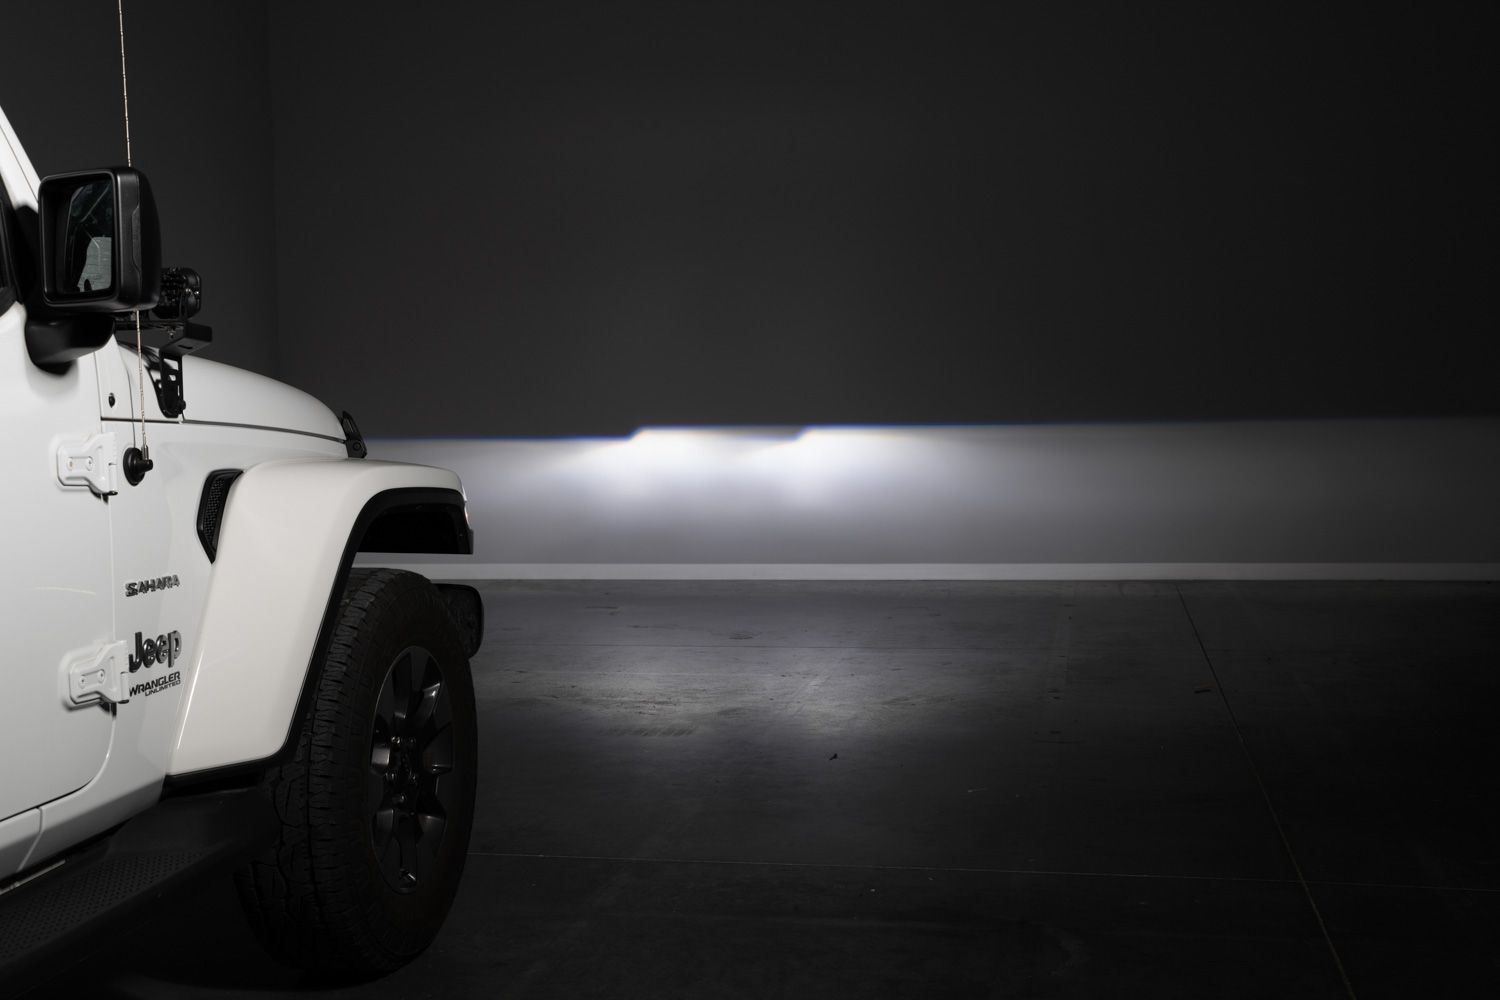
Table of Contents
- Aiming Video
- Aiming Tools
- Measuring Instructions
- Aiming Adjustment Instructions
- Questions About Aiming?
- Shop LED Headlights at Ess K Customs
Aiming Video
Note: The video demonstrates aiming on a Jeep JL Wrangler, but the same steps apply to virtually any vehicle.
Aiming Tools
- Tape
- Measuring tape
- Long Phillips head screwdriver
- Headlight adjustment key (if your headlights came with one)
Measuring Instructions
Before getting started, make sure your vehicle is on a level surface with tires inflated to the recommended levels. Remove any excess weight that isn't normally in the vehicle.
Step 1 — Position Vehicle
Park your vehicle 25 feet away from a flat wall or garage door.
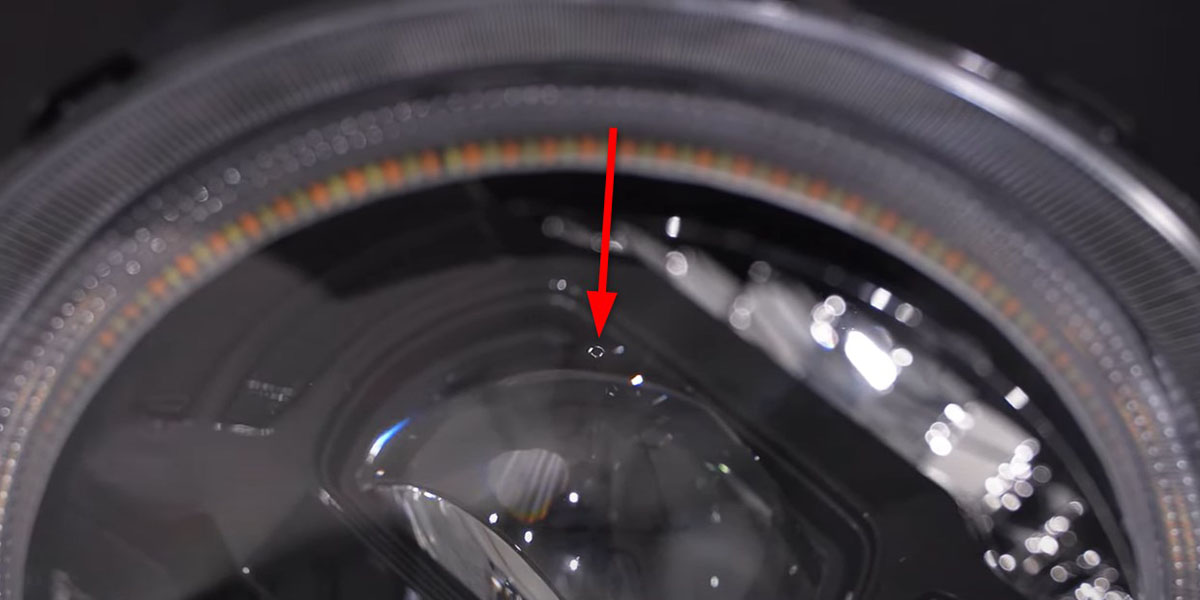
Step 2 — Measure Headlight Height
Measure from the ground to the center of your LED headlight. Look for a small aiming dot that may be molded into the lens if your headlights have more than one projector.
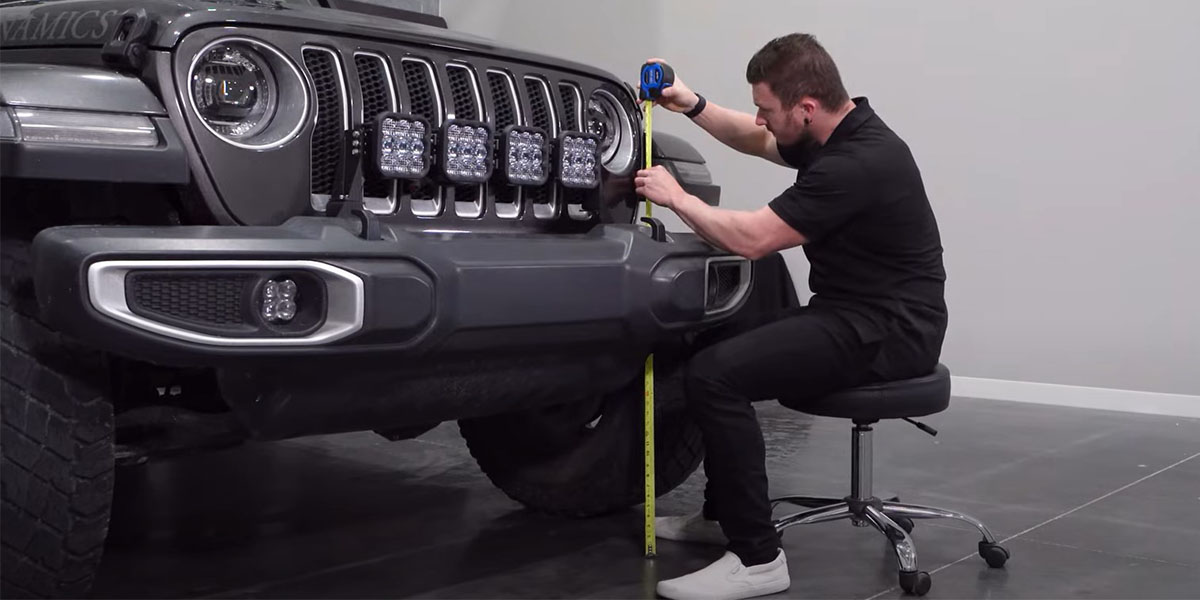
Step 3 — Measure Distance Between Headlights
Measure the distance between the center of each LED headlight (or the aiming dots if present).
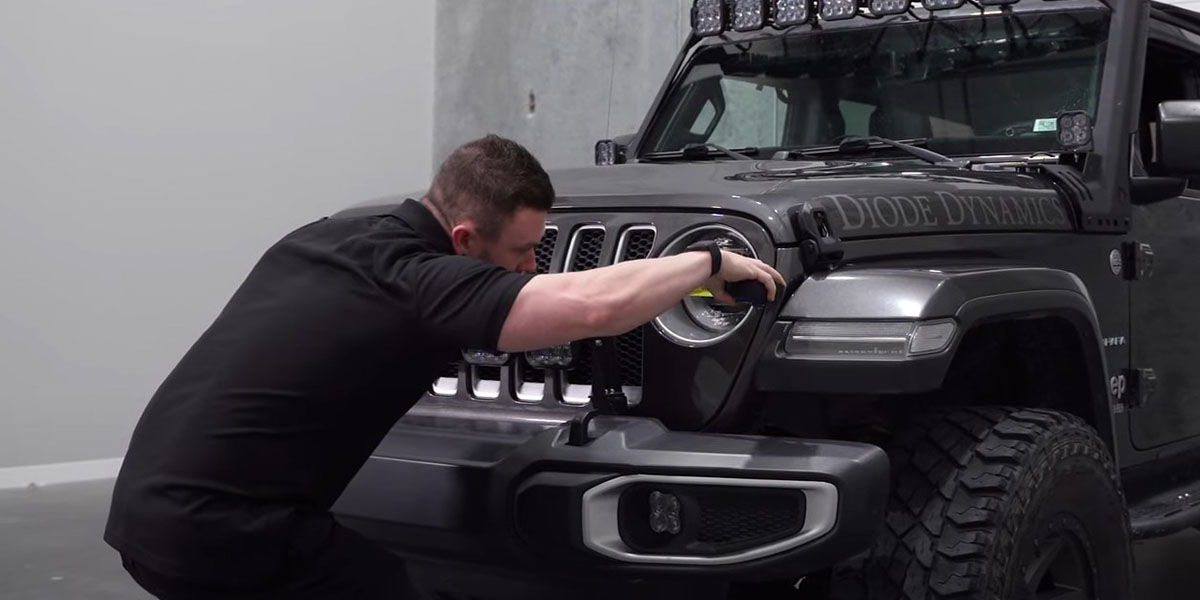
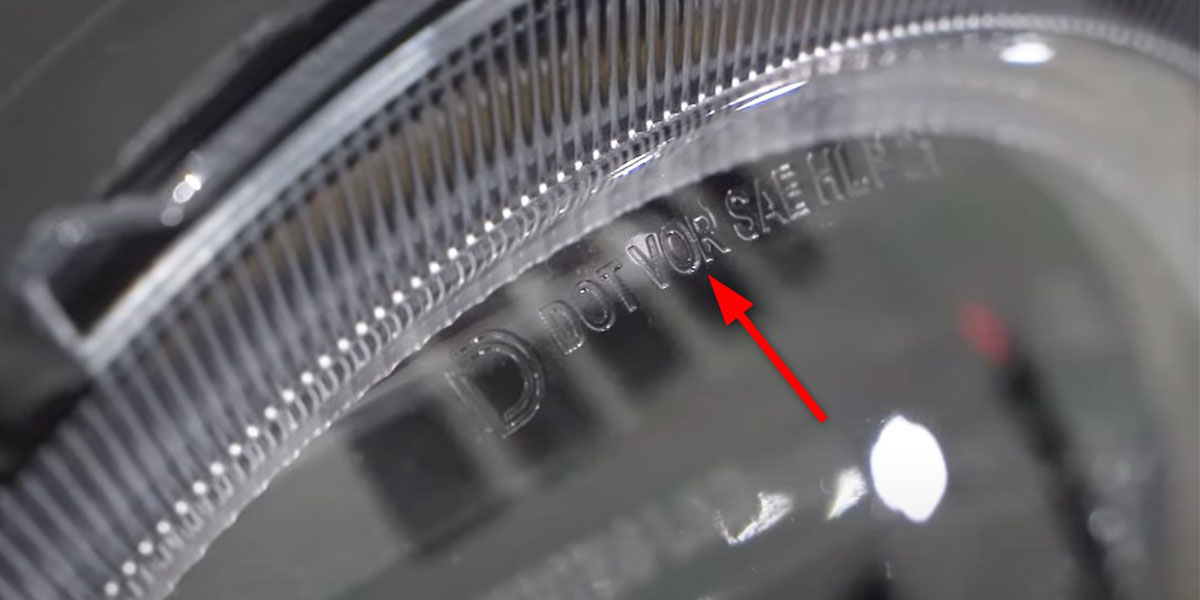
Step 4 — Identify VOL/VOR Markings
Look for "VOL" (Visual-Optical Align Left) or "VOR" (Visual-Optical Align Right) markings molded into the top or bottom of the headlight lens. All modern LED headlights will have these marks.
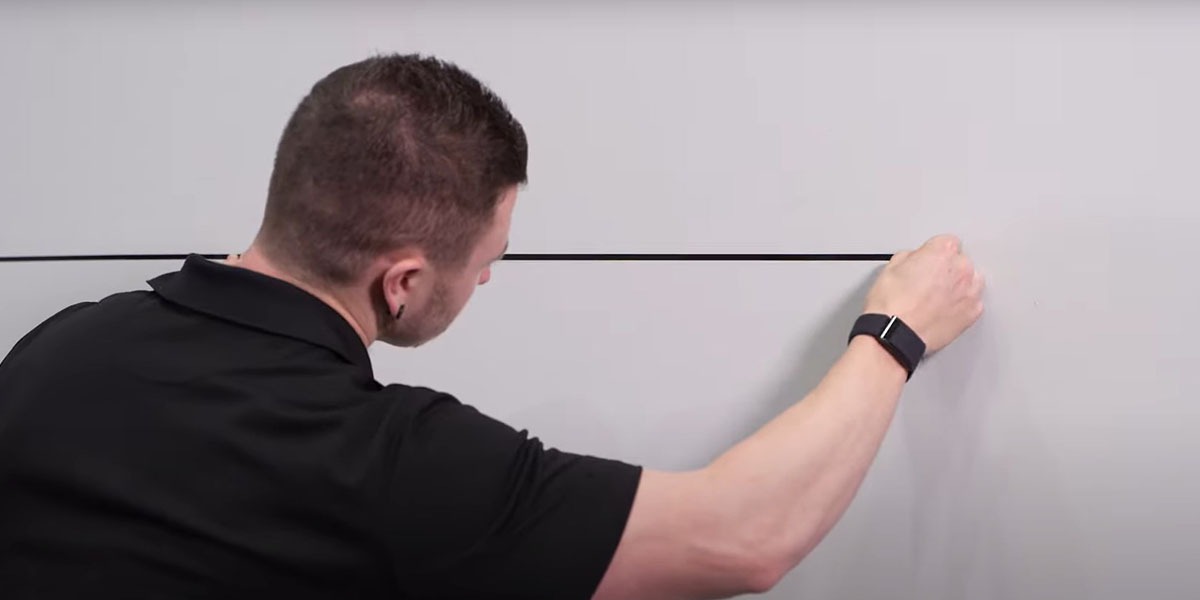
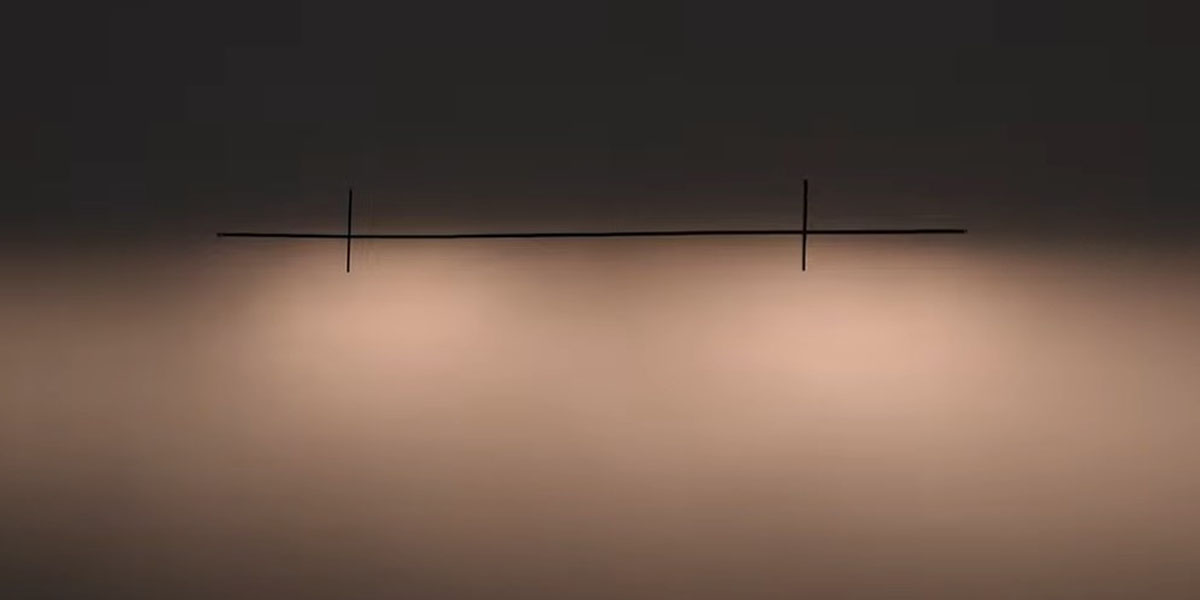
Step 5 — Mark Headlight Height on the Wall
Mark the measured height with a long piece of horizontal tape on the wall.
Note: DOT standards state that vehicles with headlight centers taller than 36 inches should aim two inches below their measured height.
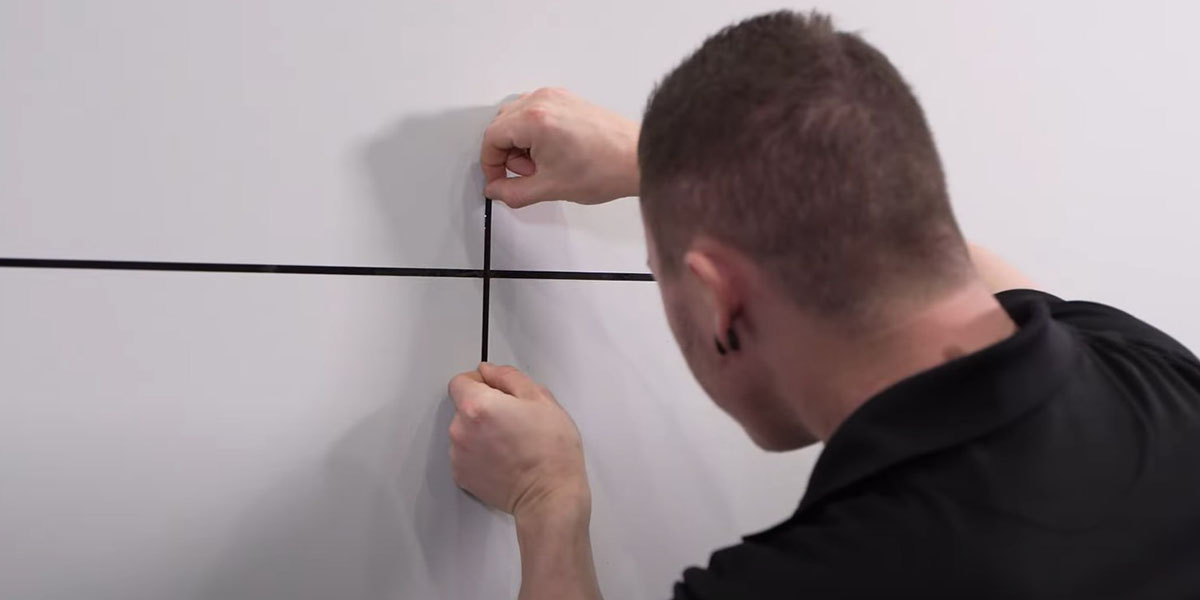
Step 6 — Mark Headlight Width on the Wall
Using the distance measured in Step 3, place a piece of vertical tape on the wall in front of each headlight.
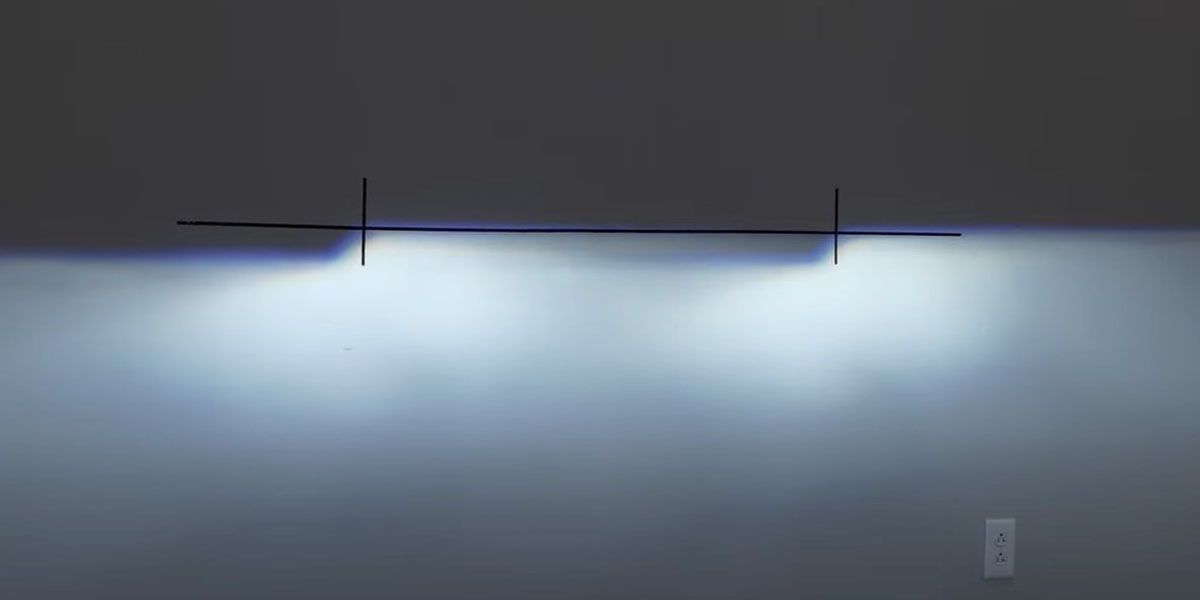
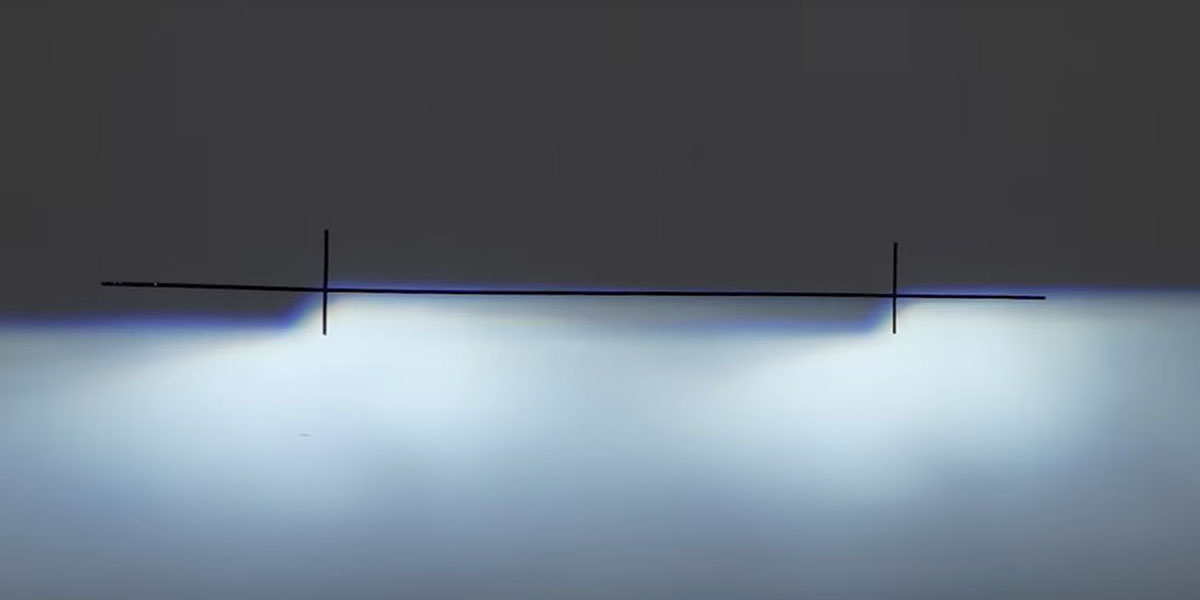
Step 7 — Turn On Low Beams
Turn on your low beams and see where they line up with your wall markings. Reflector-style headlights should show a cutoff at the top. Projector LED headlights should show a cutoff with a small step.
Aiming Adjustment Instructions
Step 8 — Access the Aiming Adjusters
Locate the aiming adjusters on your LED headlights. You may need to pull back the fender to reach them.
Step 9 — Adjust Vertical Aim
Turn the adjustment screw clockwise or counterclockwise to move the beam up or down. Refer to your manual for the correct direction.

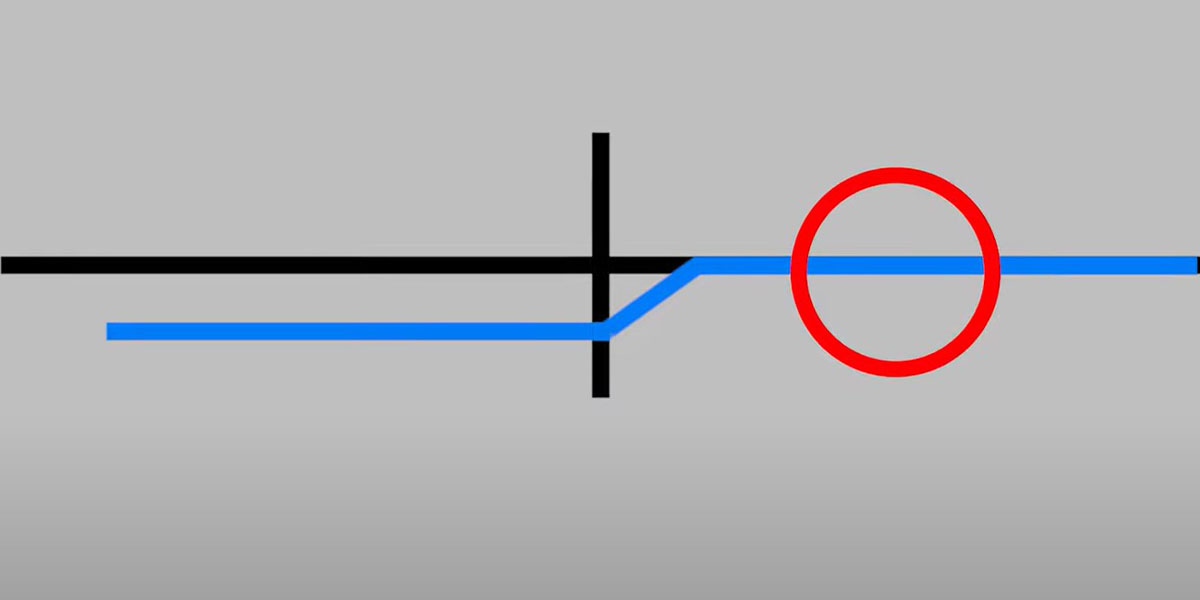
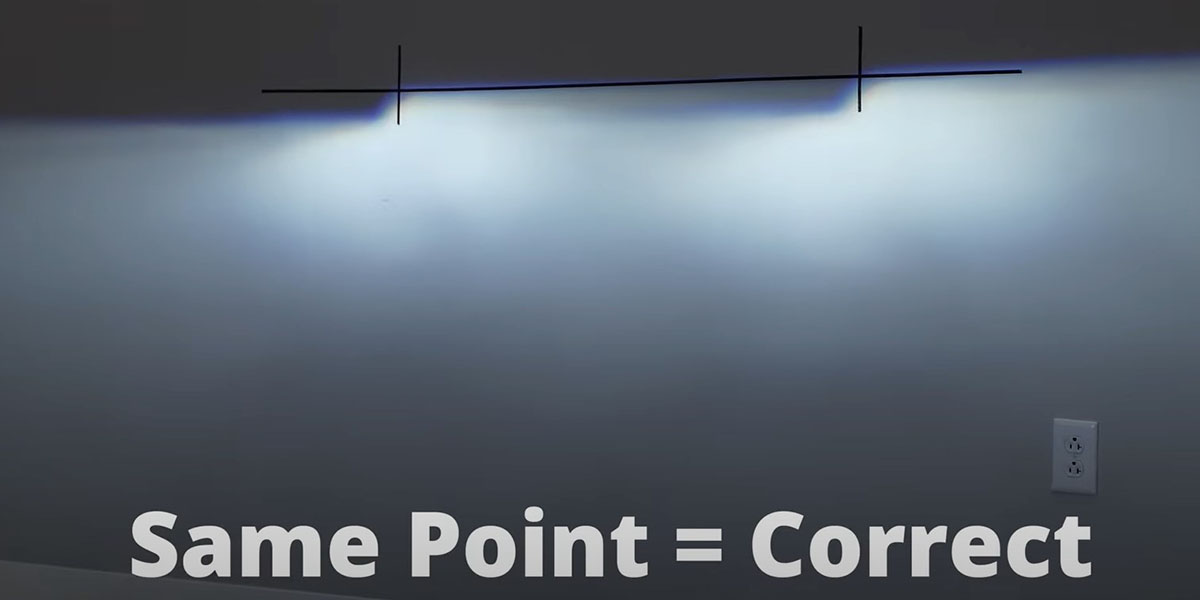
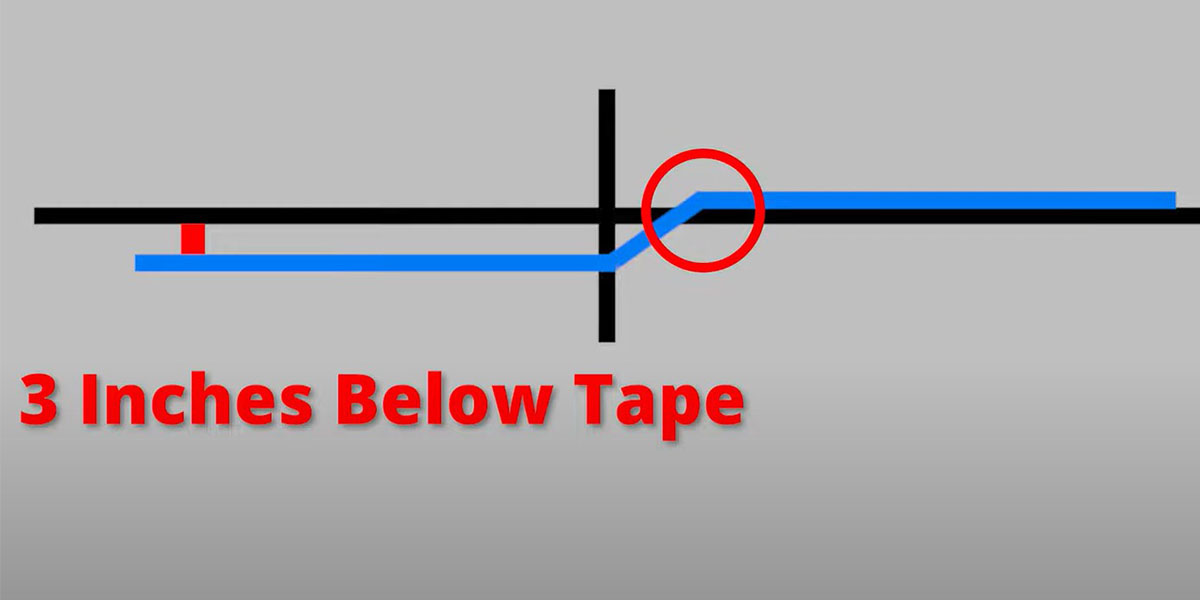
Step 10 — Aim for VOR or VOL
For VOR headlights, adjust so the right side of the beam pattern aligns with the horizontal tape. For VOL headlights, adjust the left side of the beam pattern three inches below the horizontal tape line. Make sure both beam patterns hit the tape at the same point.
Step 11 — Horizontal Adjustment (If Equipped)
If your headlights have horizontal beam adjusters, square the vehicle with the wall and adjust so the beam patterns are the same distance apart on the wall as the headlights are on the vehicle — you want them to shine parallel.
Questions About Aiming?
If you run into any issues aiming your LED headlights, contact Ess K Customs — as an authorized Diode Dynamics dealer, we're here to help.
Shop LED Headlights at Ess K Customs
Ready to upgrade your headlights? As an authorized Diode Dynamics dealer, Ess K Customs carries genuine Elite LED Headlights with full manufacturer warranty.
