
The Stealth Light Bar Kit for the 2015–2020 Chevrolet Colorado mounts a high-output LED light bar behind the factory grille for a clean, hidden appearance with serious forward-facing output. Custom brackets use factory mounting points for a secure, OEM-style installation. Here's the full install walkthrough.
Watch the full install video below, or scroll down for the step-by-step written guide.
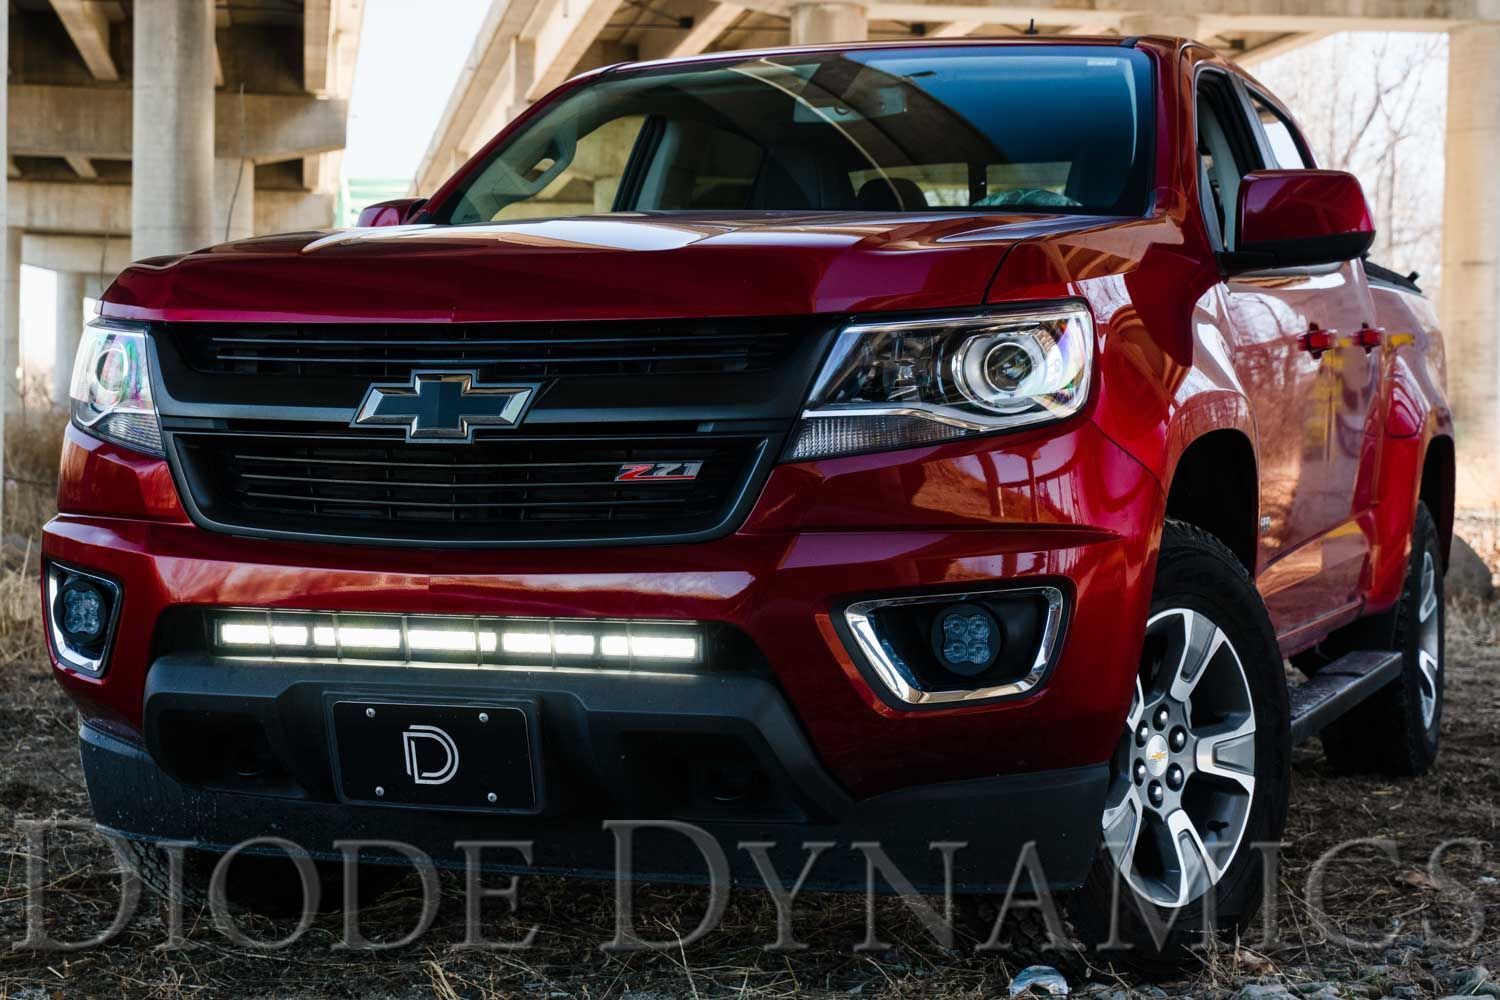
Table of Contents
- Installation Video
- Tools Required
- Installation Instructions
- Aiming and Testing
- Questions About the Install?
- Shop Colorado Light Bar Kits at Ess K Customs
Installation Video
Tools Required
- T15 Torx bit
- 7mm socket
- 10mm socket
- 15mm socket
- Ratchet and extension
Time Required: Approximately 2–3 hours.
Installation Instructions
Step 1 — Using a T15 Torx bit, remove the six screws in the wheel well that secure the fender liner. Pull the fender liner back and remove the 7mm bolt from the bumper support that secures the bumper to the chassis.
Step 2 — Inside the fender, remove the three 7mm bolts securing the bumper to the fender. Disconnect the fog light harness.
Step 3 — Remove the six T15 Torx screws securing the top of the grille to the radiator core support.
Step 4 — From underneath the truck, remove the two 10mm bolts securing the bumper to the frame. Then remove the two additional 10mm bolts inside the lower grille securing the bumper.
Step 5 — Pull the bumper and grille straight out from the vehicle to release the two push tabs securing it to the front of the truck. Set the assembly aside on a soft surface.
Step 6 — Using a 15mm socket, remove the four bolts securing the crash bar. Pull the crash bar down and out to remove it.
Step 7 — Maneuver the Stealth Light Bar brackets through the air duct and position them as shown in the installation diagram.
Step 8 — Reinstall the crash bar using the original 15mm bolts. Torque the bolts to 43 ft-lbs.
Step 9 — Install the included 30" LED light bar onto the brackets using the supplied 10mm bolts. Hand-tighten initially to allow for final aiming adjustments.
Step 10 — Route the wiring into the engine bay. Diode Dynamics recommends routing through the upper right corner of the air duct, under the headlamp, and into the engine bay. Secure wiring away from moving or hot components.
Step 11 — Slide the bumper and grille back into position, engaging the clips on both sides. Reinstall all previously removed factory hardware and reconnect the fog light harness before re-securing the fender liner.
Aiming and Testing
Step 12 — Power on the light bar and verify proper operation. Aim the light bar to the desired position, then fully tighten all mounting hardware to complete the installation.
Questions About the Install?
If you run into any issues during the installation, contact Ess K Customs — as an authorized Diode Dynamics dealer, we're here to help.
Shop Colorado Light Bar Kits at Ess K Customs
Ready to upgrade your Colorado with a Stealth Light Bar Kit? As an authorized Diode Dynamics dealer, Ess K Customs carries genuine products with full manufacturer warranty.
Shop Stealth Lightbar Kit for 2015-2020 Chevrolet Colorado →
This install guide applies to Diode Dynamics SKUs: DD6359, DD6357, DD6362