
Stage Series Rock Lights are compact, versatile, and built for serious off-road use. This universal guide covers mounting and wiring for all Stage Series Rock Light kits — single color and RGBW, 4-packs and 8-packs. Disconnect the negative battery terminal before starting.
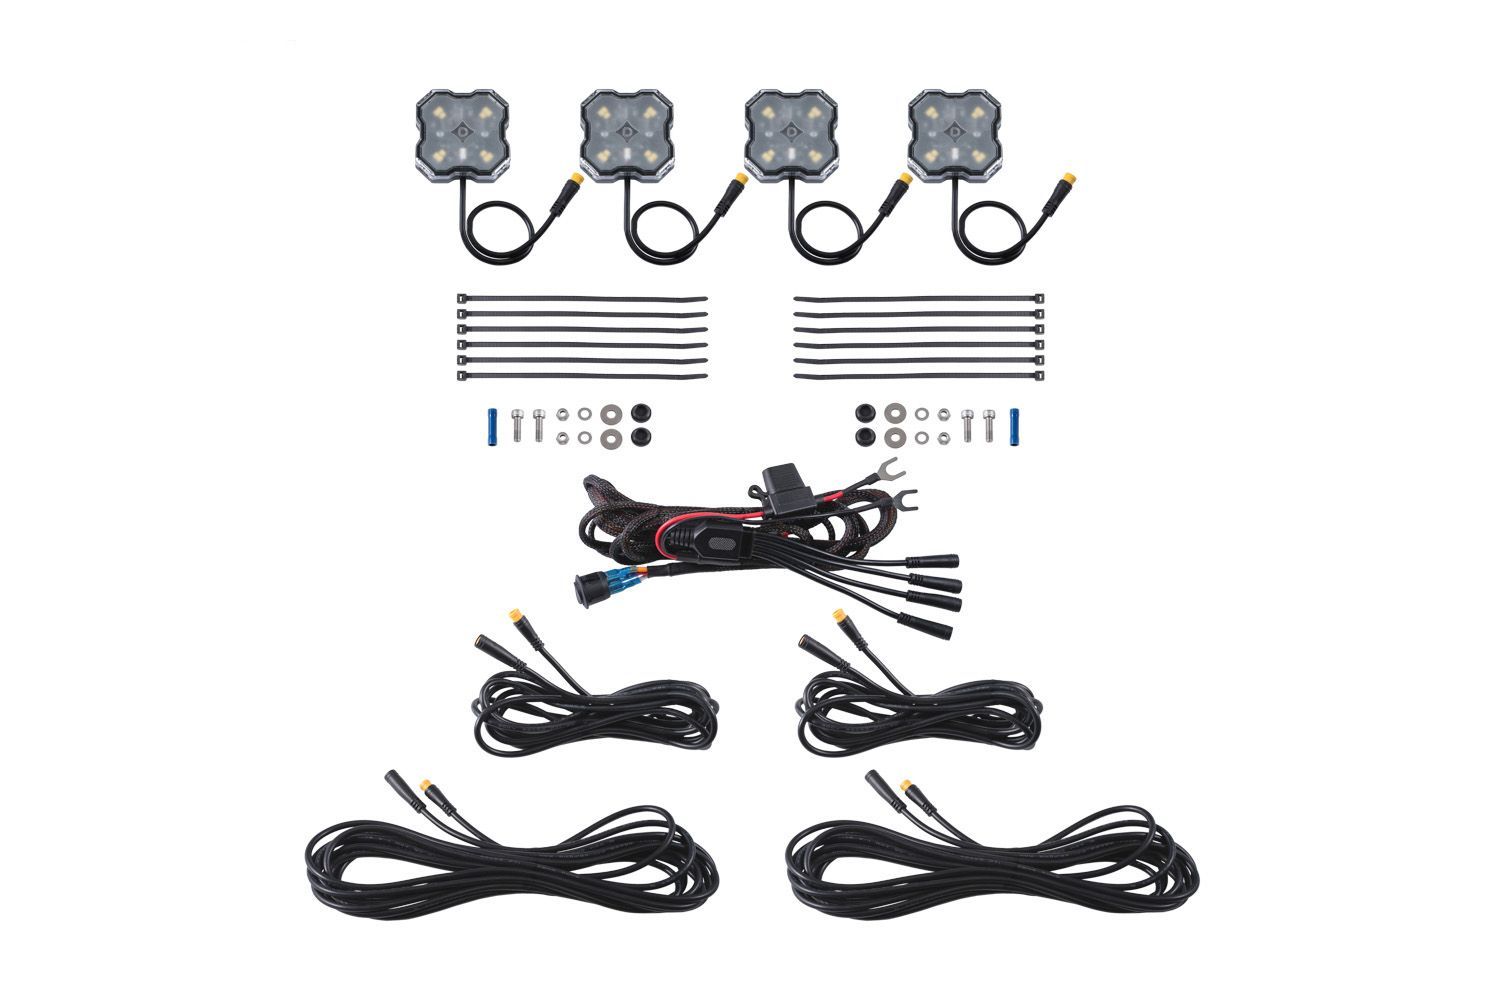
Table of Contents
- Mounting Video
- Tools Required
- Mounting Instructions
- Wiring Instructions
- Questions About the Install?
- Shop Rock Lights at Ess K Customs
Mounting Video
Tools Required
- Drill
- 7/32" or 15/64" bit
- 3/8" bit
- 3/4" bit
- Zip ties (included)
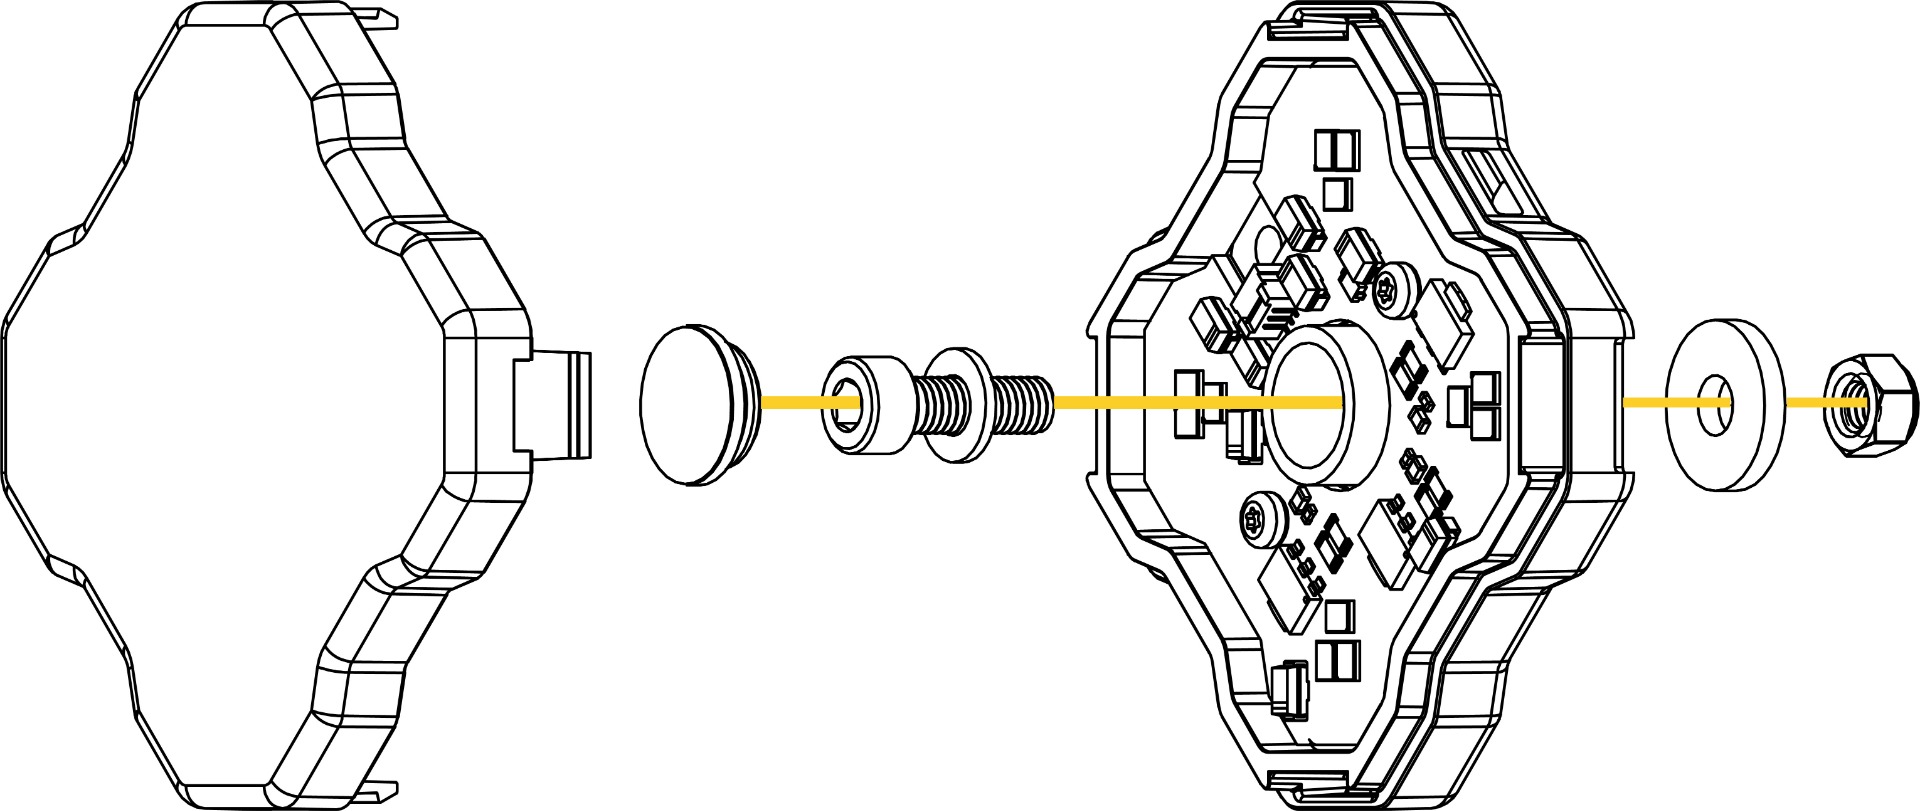
Mounting Instructions
Step 1 — Prepare and Mount Rock Lights
Identify your desired mounting location. Remove the outer lens from the rock light, then remove the center rubber dust seal. Drill a 7/32" or 15/64" hole in your chosen location. If you want to hide the wiring, line up the light and drill an additional 3/8" hole to route the wire through the mounting surface. Mount using the included nut, bolt, and washers. Alternative: Use the integrated side tabs to zip-tie mount the rock light to any available attachment point. Reinstall the rubber dust seal and clip the lens back into position.
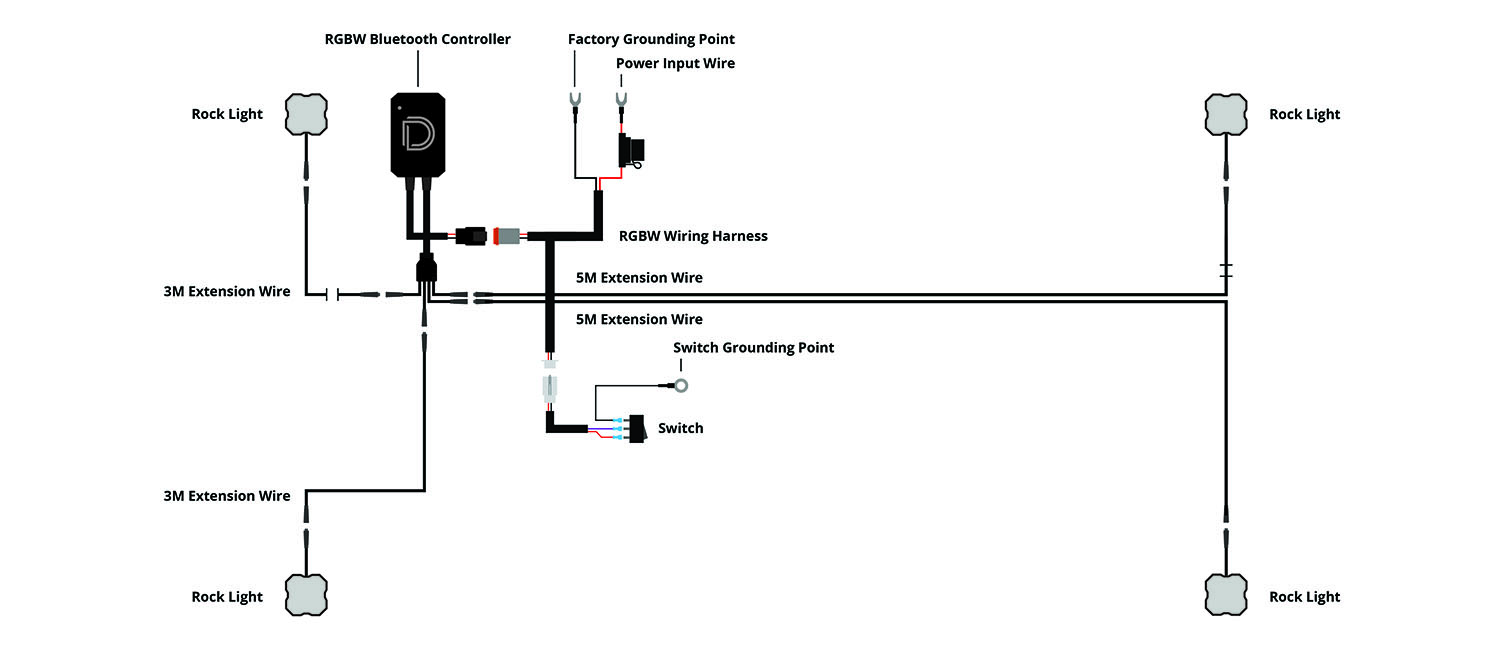
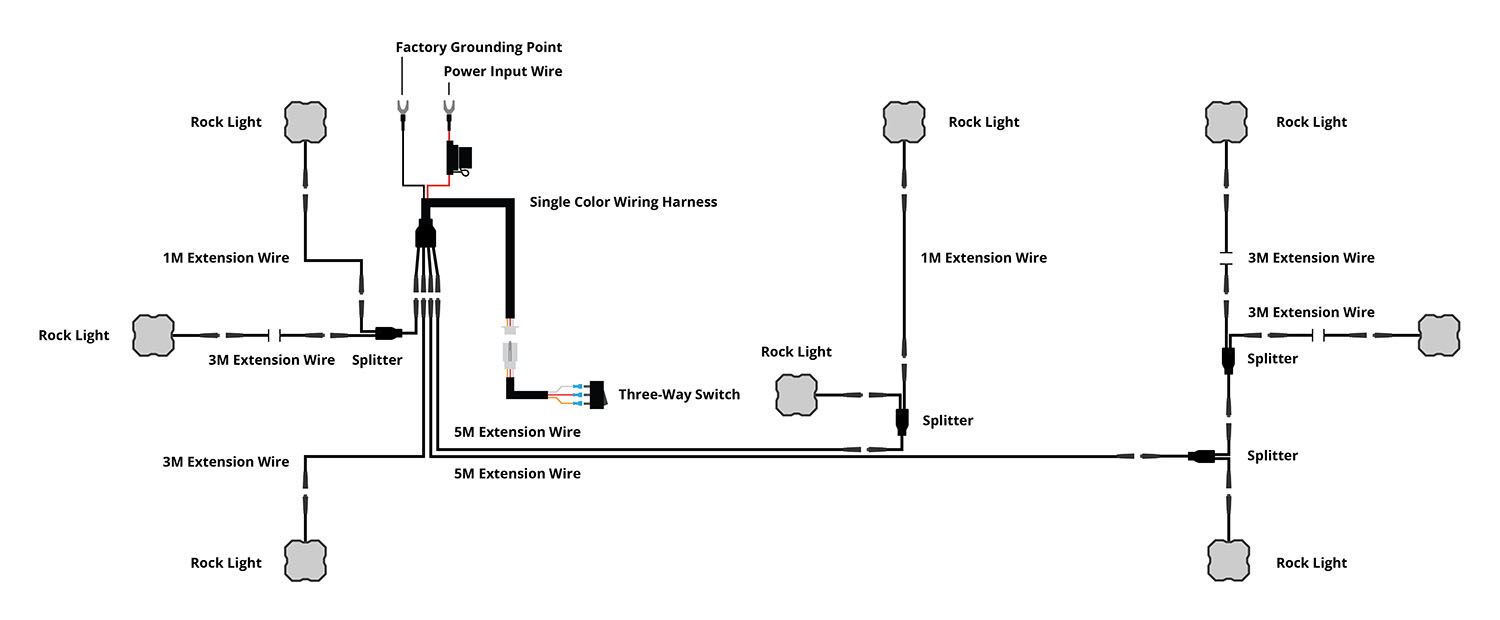
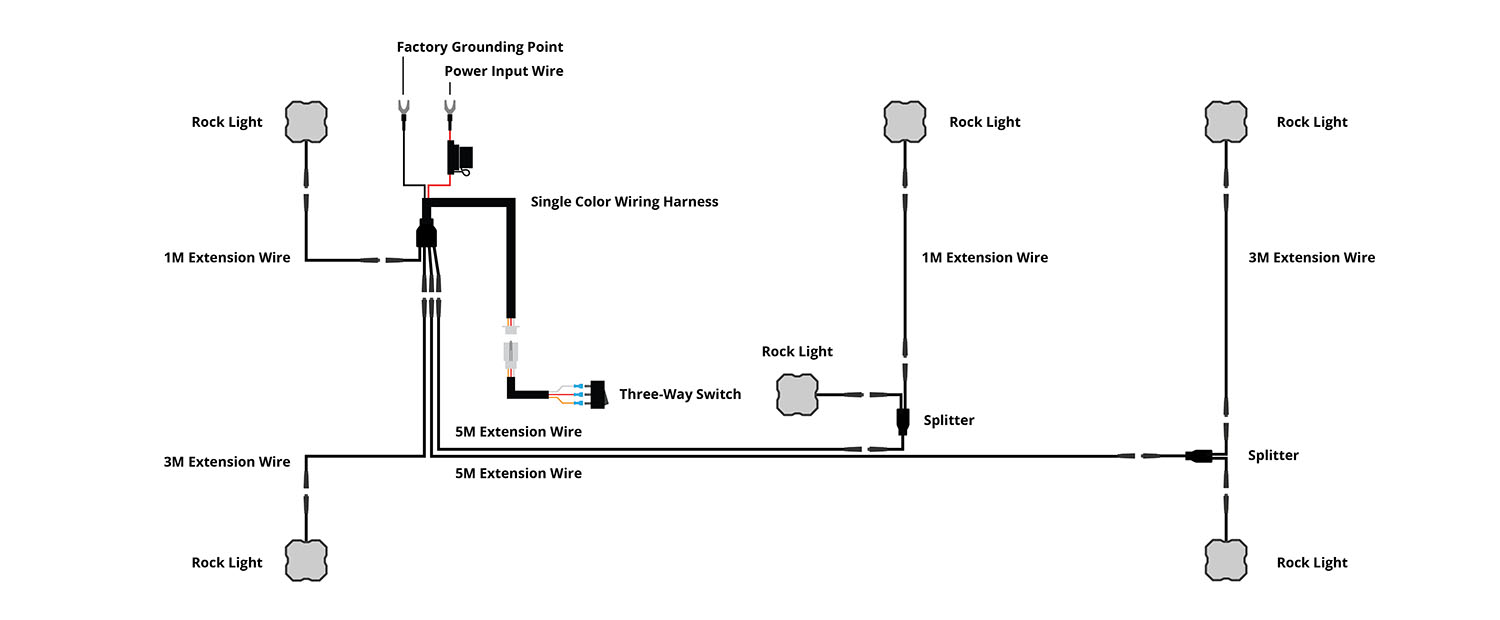
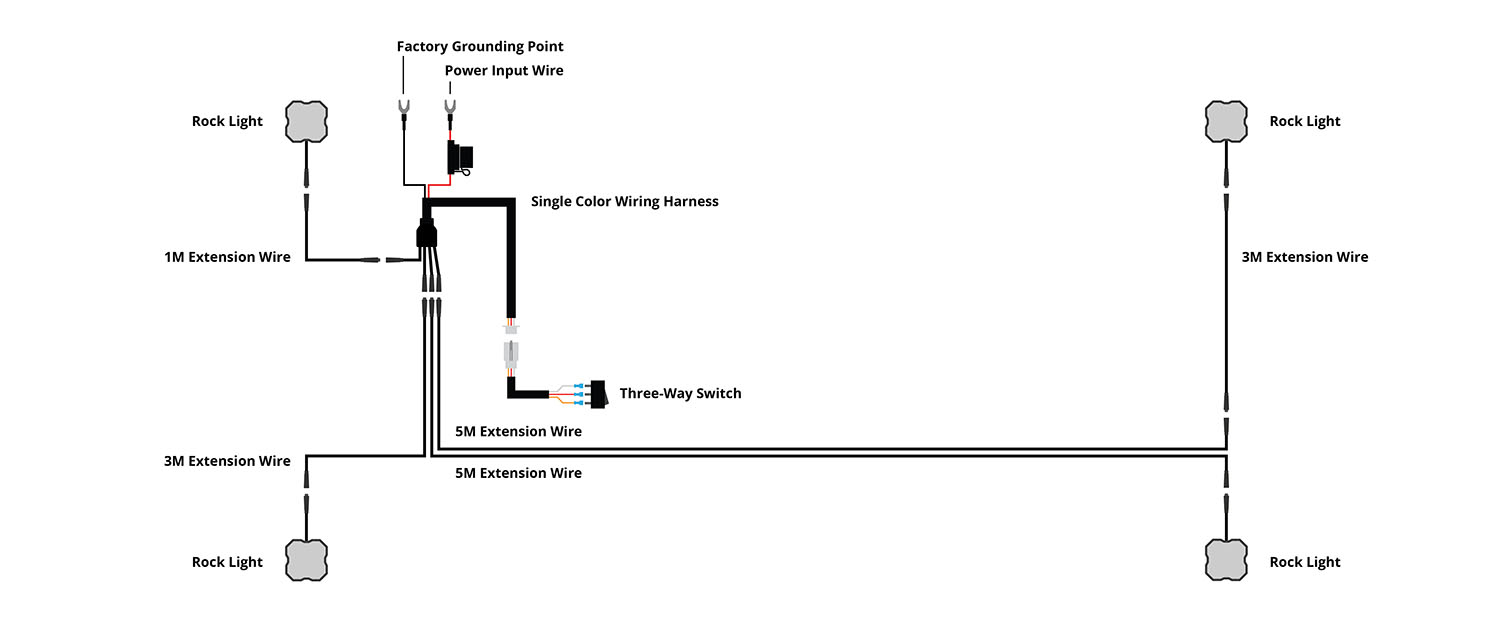
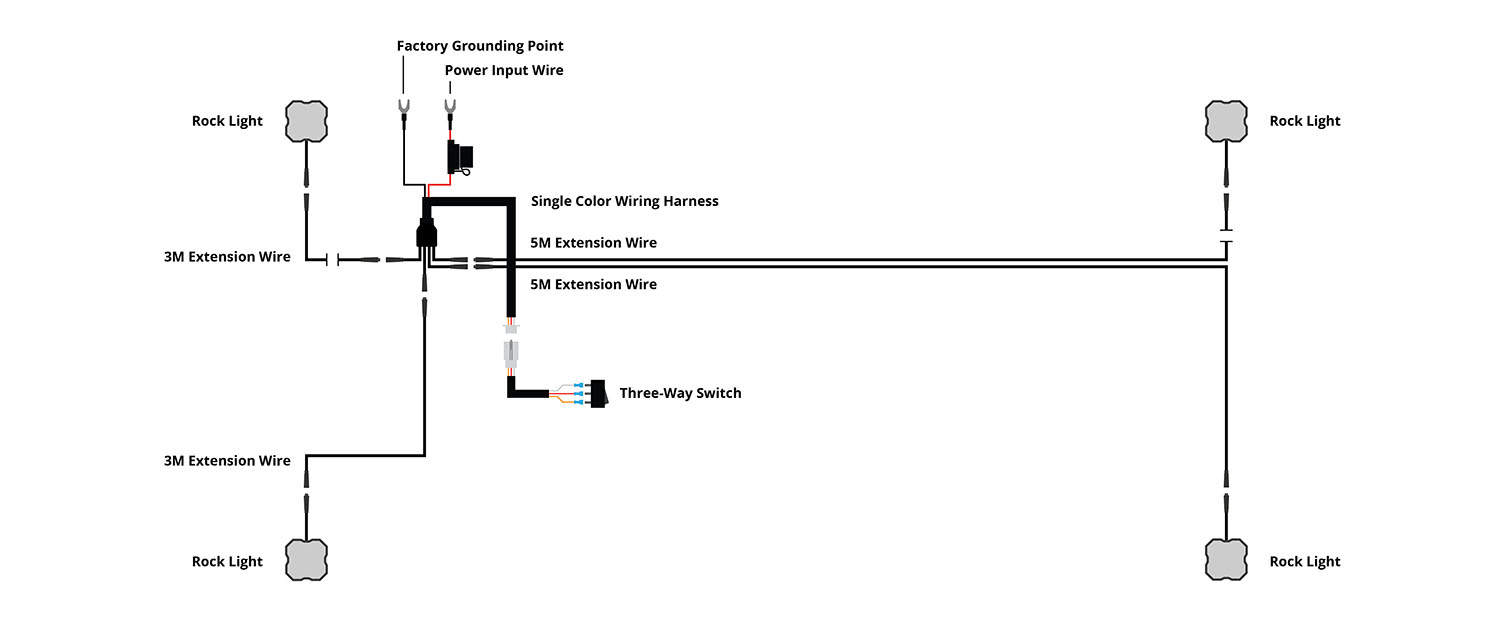
Wiring Instructions
Step 2 — Connect to Power
Determine a suitable location near the battery or main power terminal. Connect the red power input wire to the positive battery terminal. Connect the black ground wire to the negative battery terminal or a factory grounding point.
Step 3 — Mount Switch
Determine a switch location in the cabin and route the switch wiring (this may require going through the firewall — unplug the switch while routing for easier access). Drill a 3/4" hole and mount the switch. Note: The gold spade on the switch connects to the black (ground) wire.
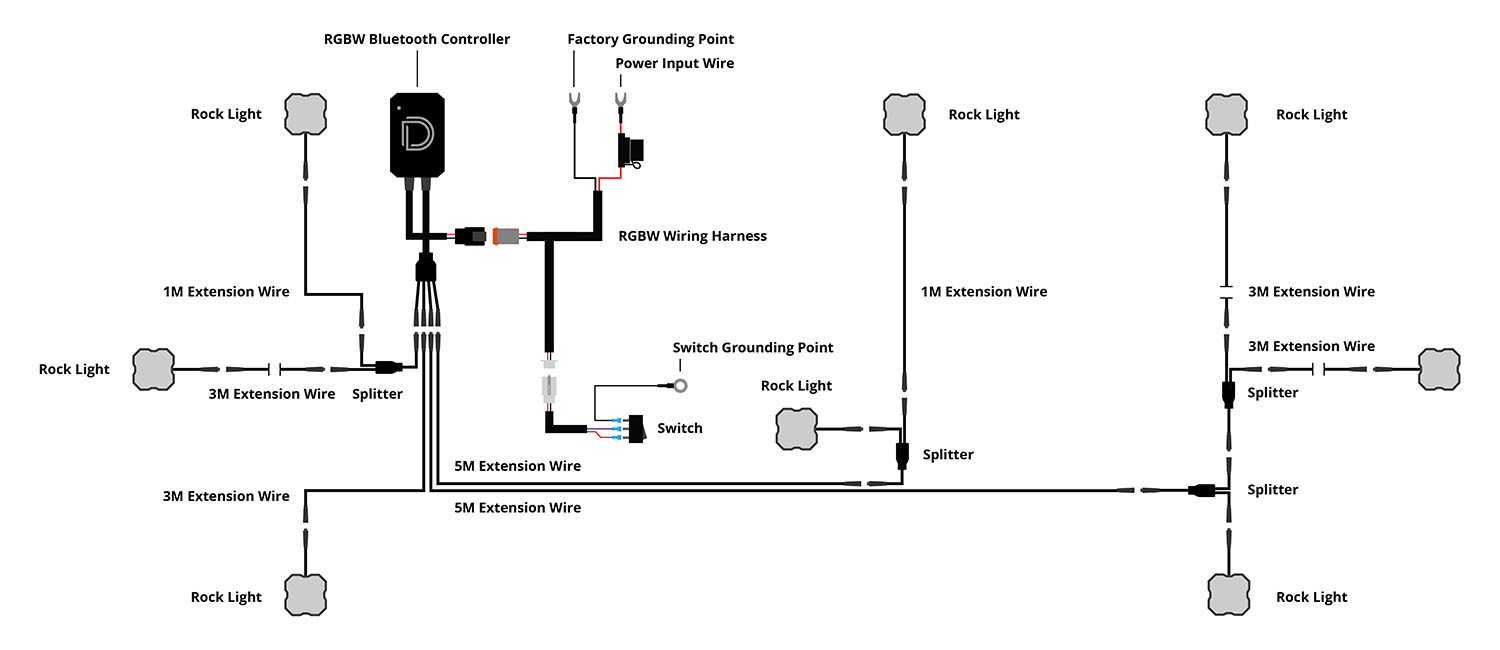
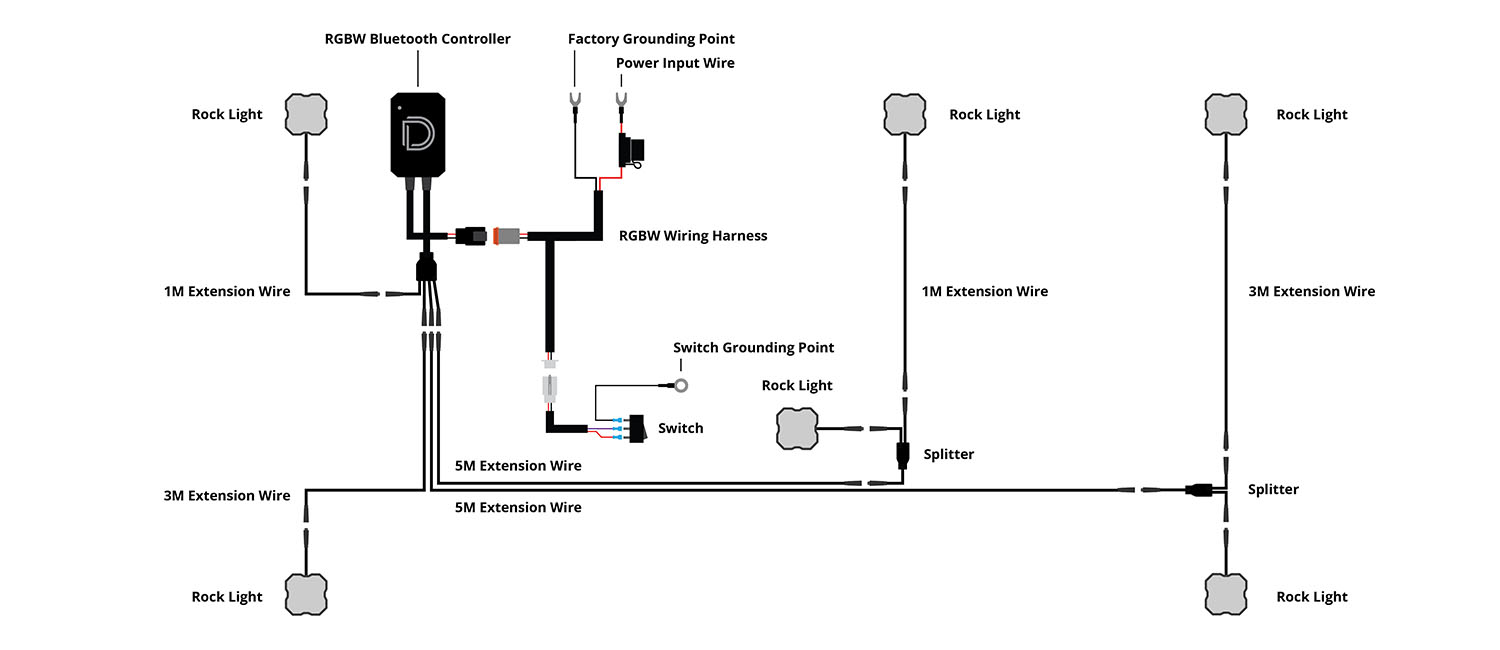
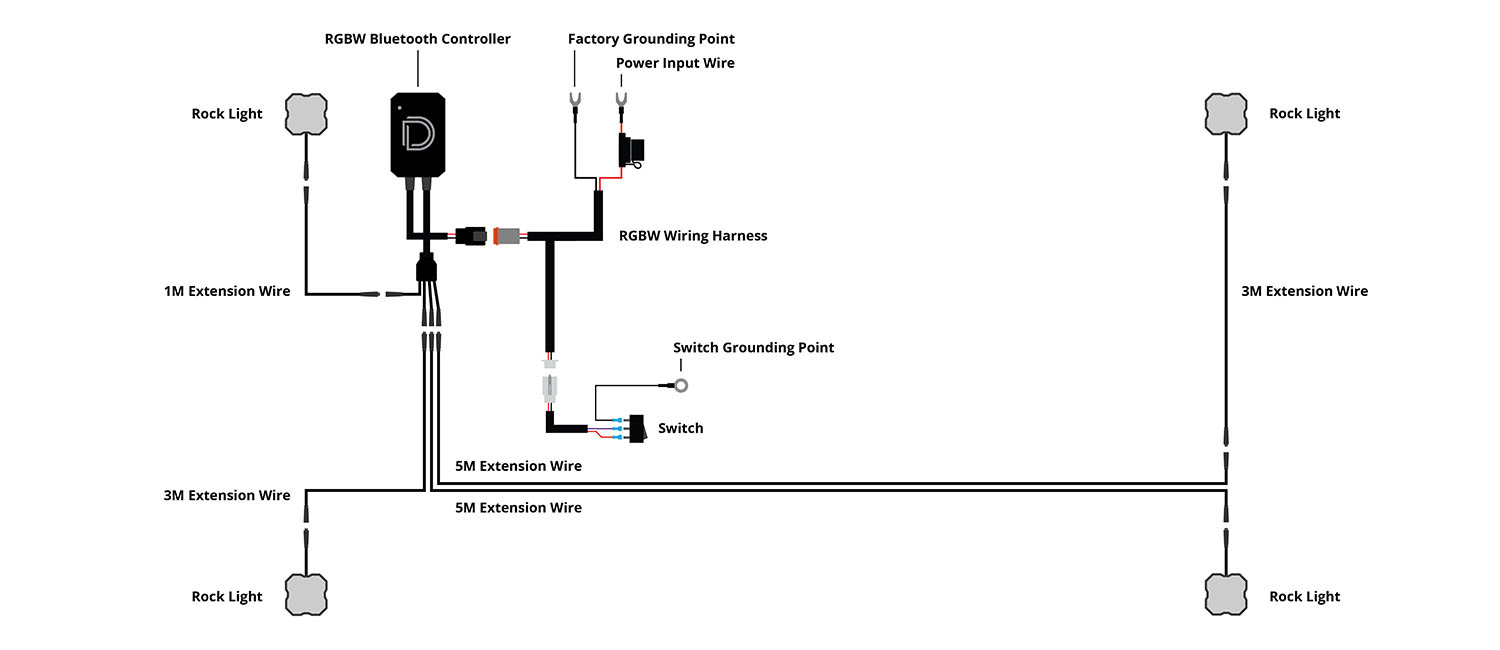
Step 4 — Route Extension Wires and Connect
Depending on your kit, route the included extension and splitter wires (3M and 5M lengths) to each LED. Avoid moving parts or direct contact with heat sources — following the factory wire loom is best practice. Plug the output connector into each rock light. Tip: When disconnecting M8 connectors, grip both sides of the connector housing close to the connection point. Pulling from the wire can damage internal wiring — the connector should separate with steady, even pressure.
Step 5 — Test and Secure
Reconnect the negative battery terminal, test all lights thoroughly, and secure any excess or loose wiring. Check your local laws regarding on-road use restrictions.
Questions About the Install?
If you run into any issues during the installation, contact Ess K Customs — as an authorized Diode Dynamics dealer, we're here to help.
Shop Rock Lights at Ess K Customs
Ready to add rock lights to your rig? As an authorized Diode Dynamics dealer, Ess K Customs carries the full Stage Series Rock Light lineup — single color, RGBW, all pack sizes, and mounting accessories — with full manufacturer warranty.
Browse Stage Series Rock Lights at Ess K Customs →
This install guide applies to Diode Dynamics SKUs: DD7429-DD7475