
The Midline RGBW DRL LED Boards for the 2019-2023 Ram Laramie and Rebel convert your factory DRL LEDs into full multicolor functionality. These boards are a direct replacement for the factory LED panels inside the headlight. Pair with a Diode Dynamics RGBW controller (sold separately) for complete color control. Here's the full walkthrough.
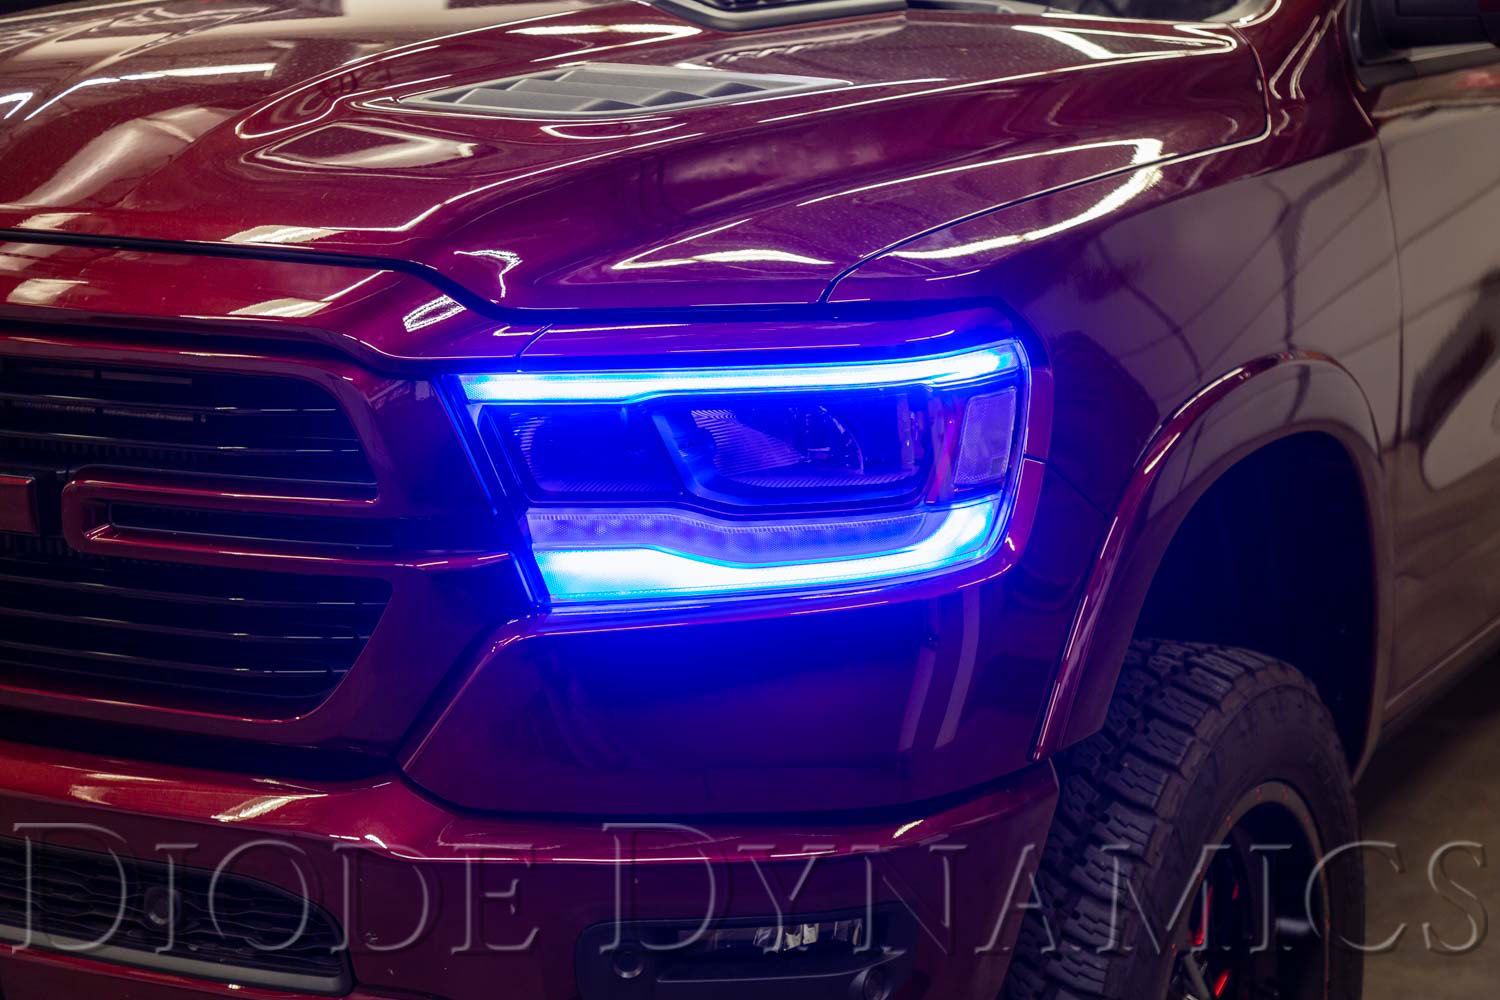
Table of Contents
- Tools Required
- Mounting Instructions
- Wiring Instructions
- Questions About the Install?
- Shop Ram Lighting at Ess K Customs
Important: Headlights must be opened before proceeding with installation. Professional installation is strongly recommended.
Tools Required
- Torx T20 screwdriver
Mounting Instructions
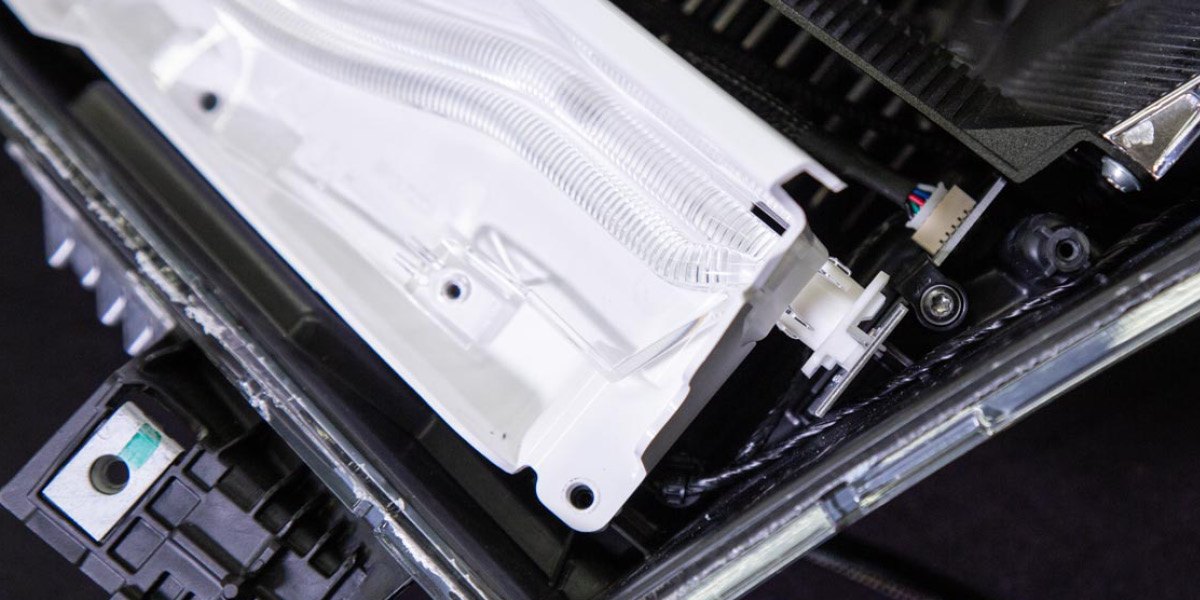
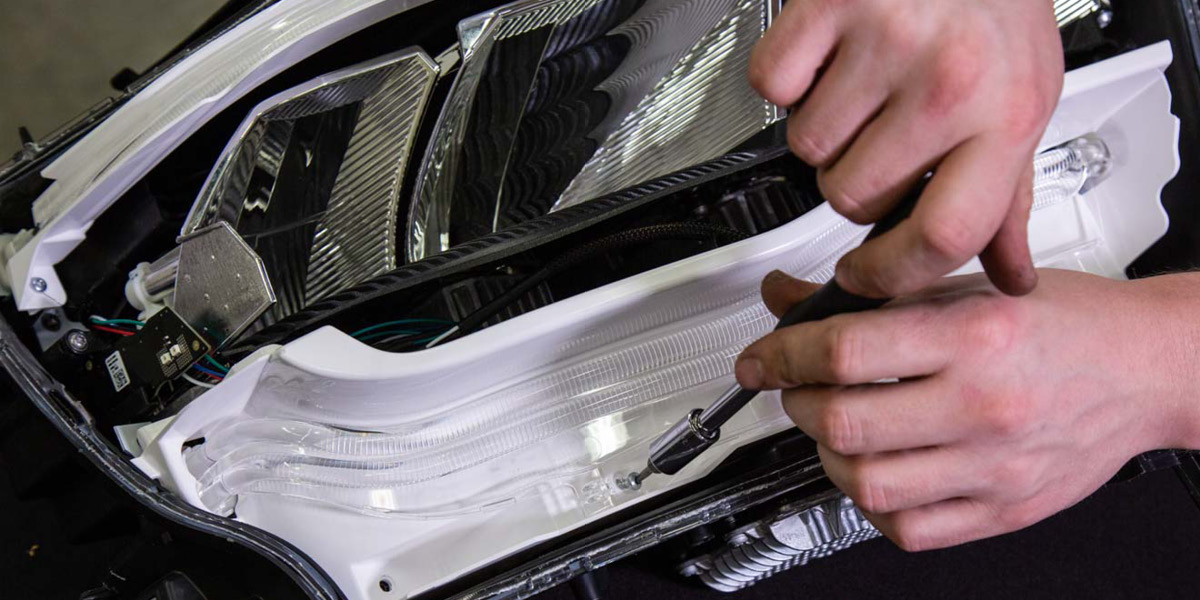
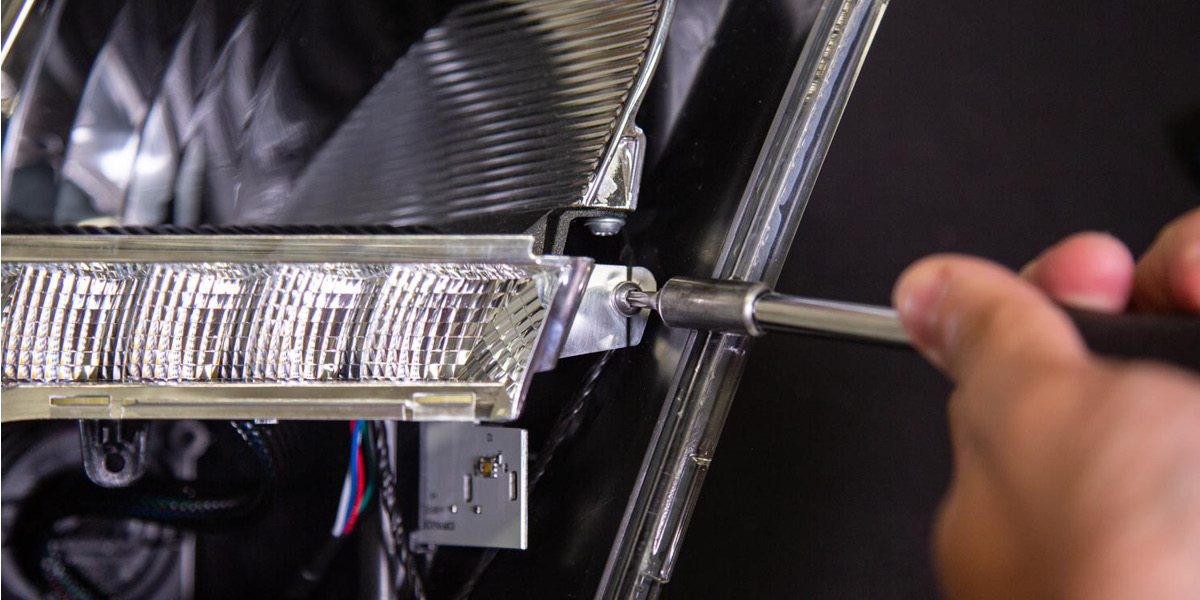
Step 1 — Remove the Lower Optics
Remove the four T20 screws holding the lower optics shroud and light pipe in place. Remove the light pipe from its retaining clips by gently pulling the pipe away from the board until the tabs release. Repeat for the other side to fully remove the light pipe. Remove the final T20 screw and pull the shroud straight up to remove it. Remove the retaining clips from the lower boards by gently prying the tabs.

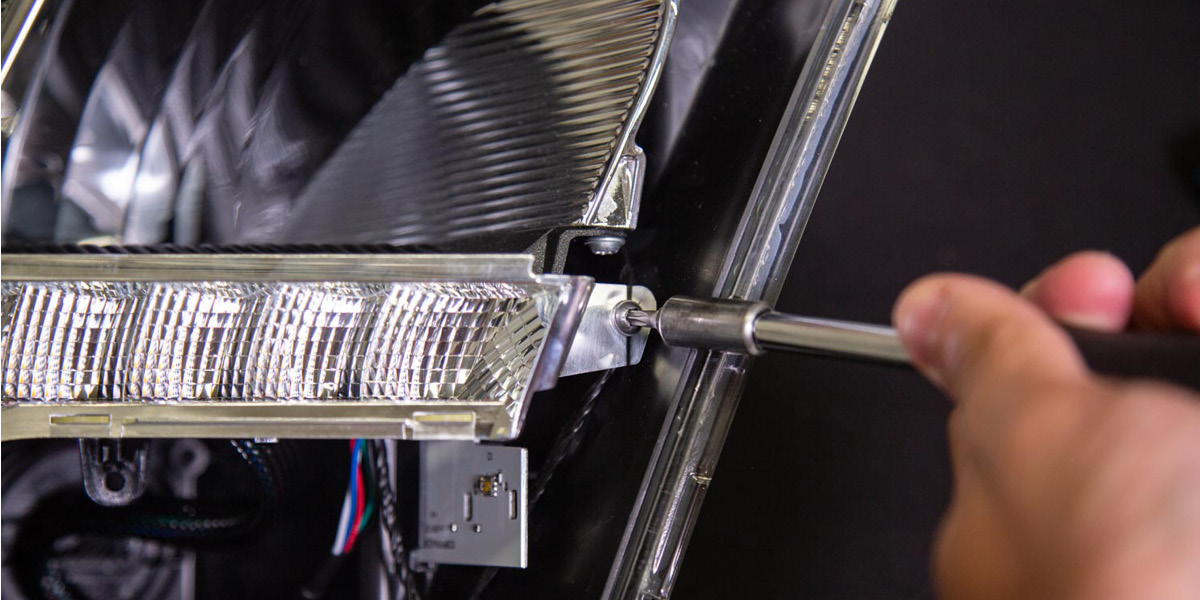
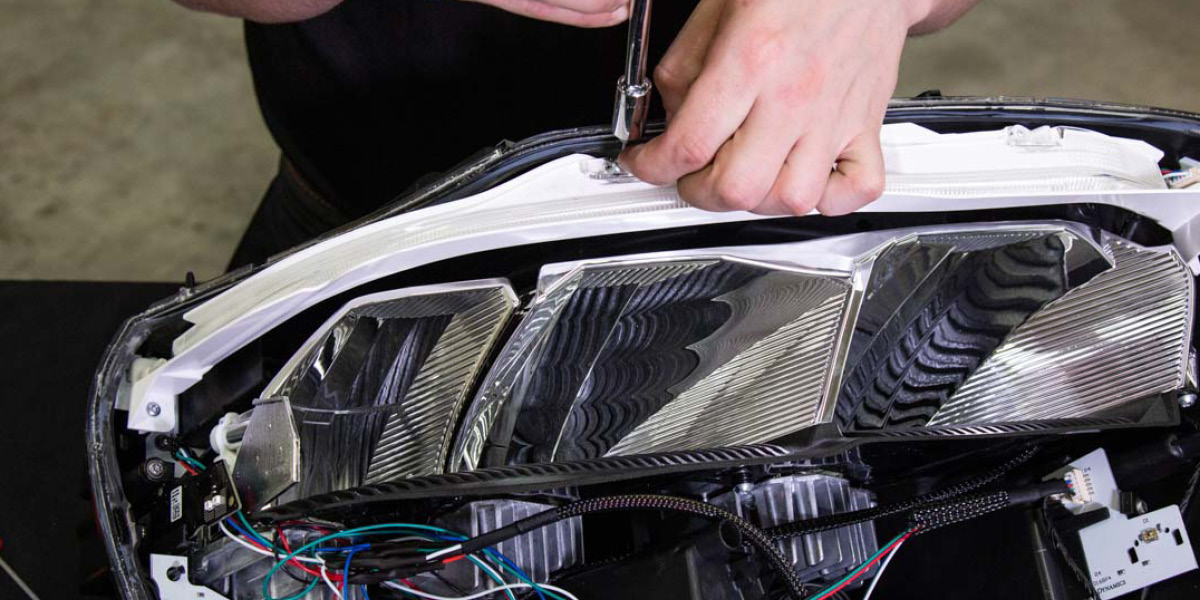
Step 2 — Remove the Turn Signal and Upper Optics
Remove the screw holding the turn signal reflector in place on each side and disconnect the factory harness. Set the housing aside. Remove the five T20 screws holding the upper optics shroud and light pipe in place. Remove the upper light pipe from its retaining clips the same way as the lower.
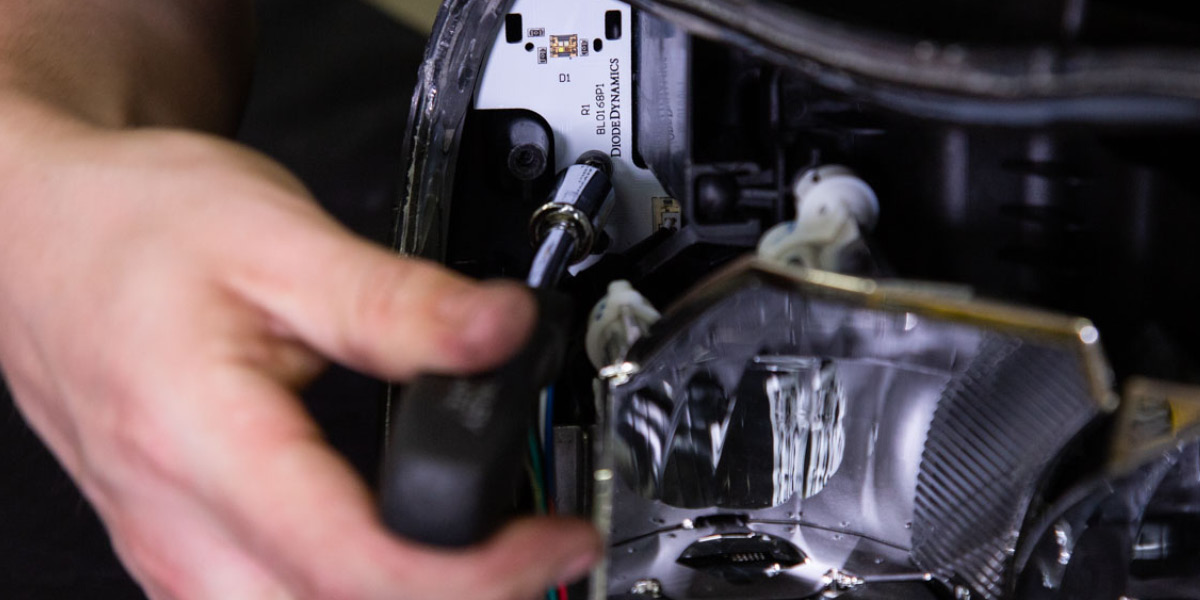
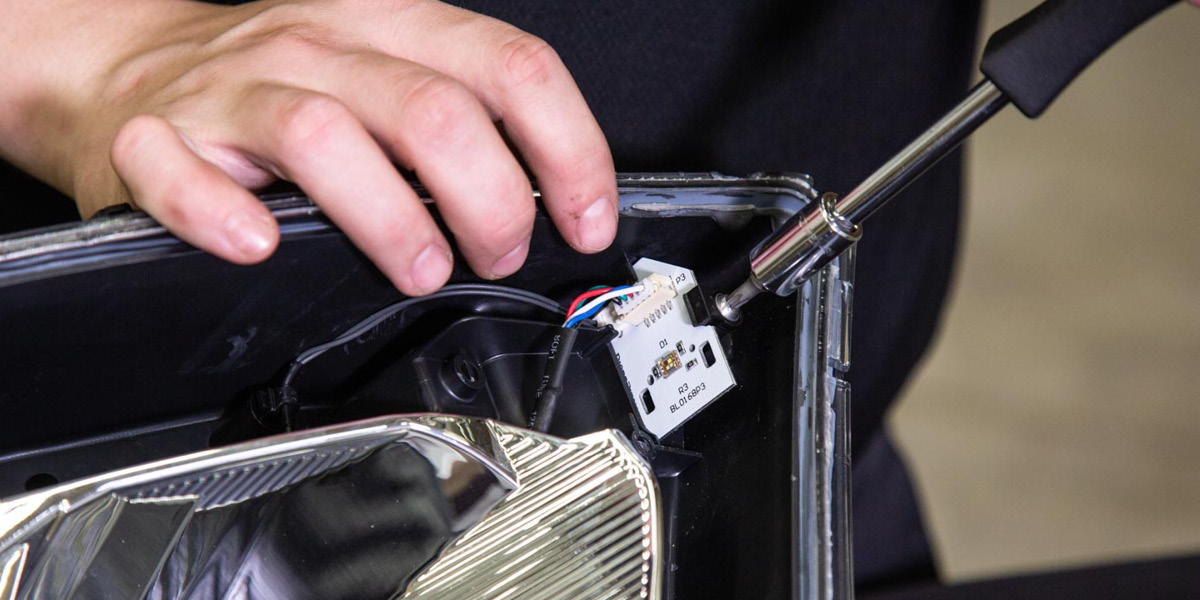
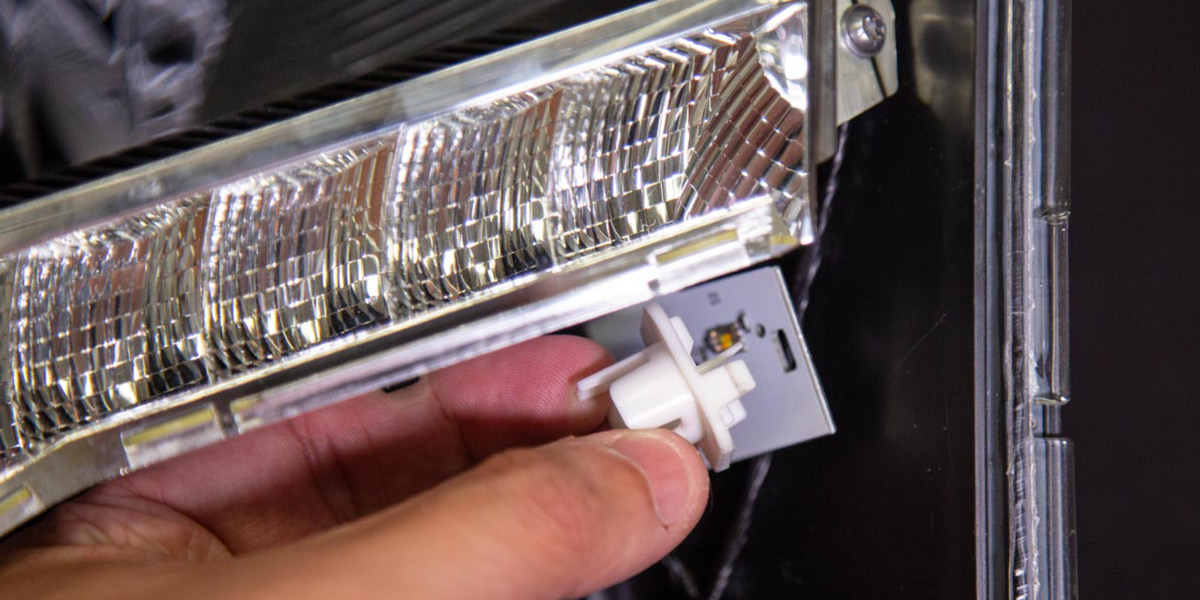
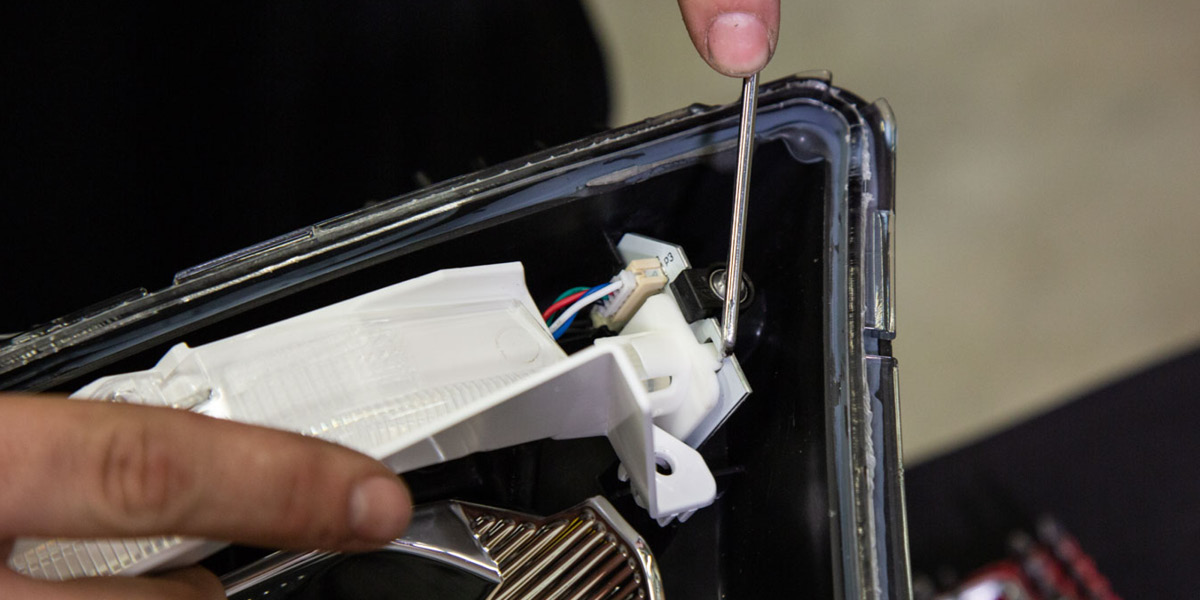
Step 3 — Swap the LED Boards
With both optics shrouds and the turn signal reflector removed, remove the four T20 screws holding the factory boards. Disconnect the factory board harnesses and remove the factory boards (they won't be reused — leave the harnesses hanging in place). Install the new Diode Dynamics LED boards using the original screws.

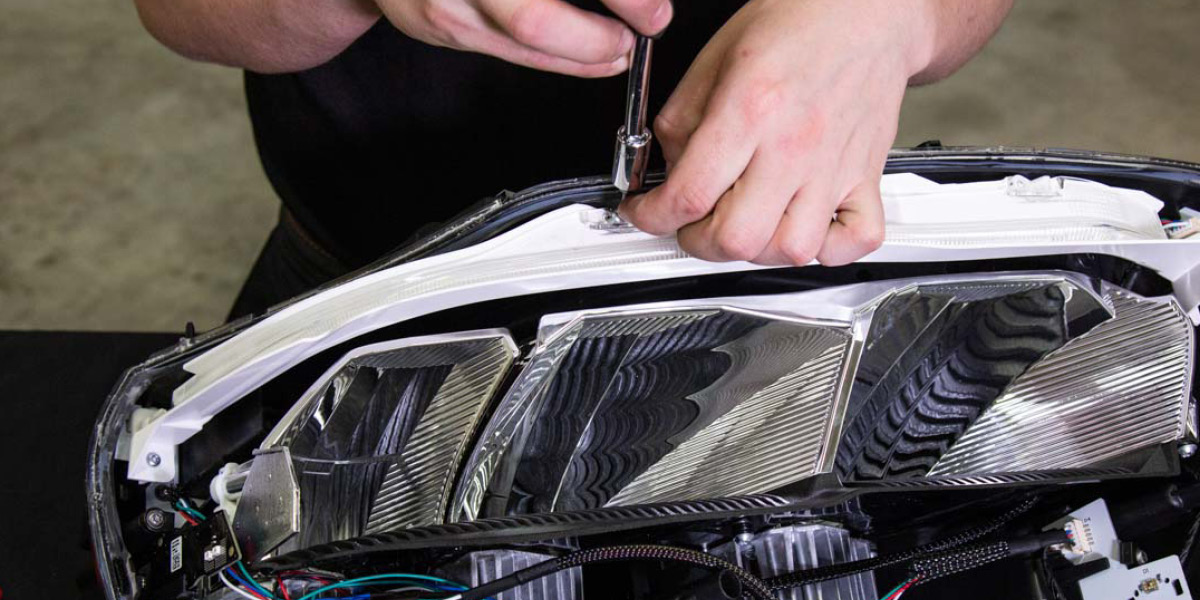
Step 4 — Reassemble the Headlight
Reinstall the lower retaining clips to the new LED boards. Secure the upper optics shroud back in the retaining clips and reinstall the five screws. Route the wiring out of the headlight, sealing any holes you create. Reinstall the turn signal reflector by reconnecting the factory harness and reinstalling the screw. Reinstall the lower optics shroud, reconnect the light pipe to the retaining clips, and reinstall the four original screws.
Wiring Instructions
Step 5 — Connect the RGBW Driver and Controller
Connect the LED board to the RGBW driver. Using the JST-to-M8 adapter wire included with the Diode Dynamics controller, connect the driver to the controller (sold separately).
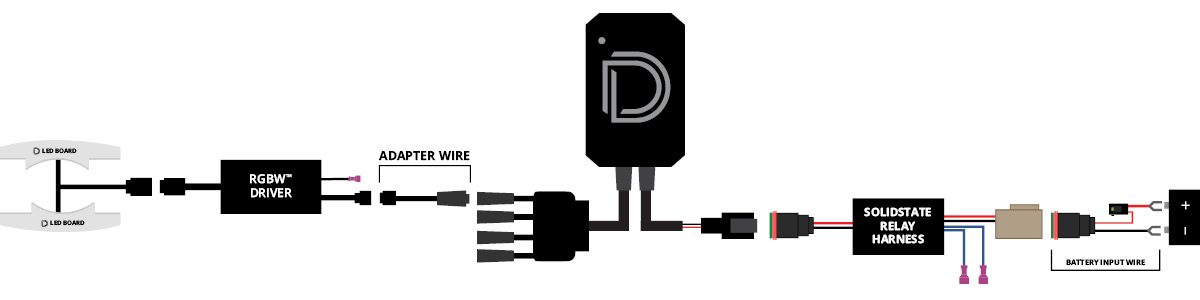
Important: Do NOT plug the LED panel directly into the controller without the driver. The LEDs must be connected to the driver first to control power.
Step 6 — Connect Power and Complete
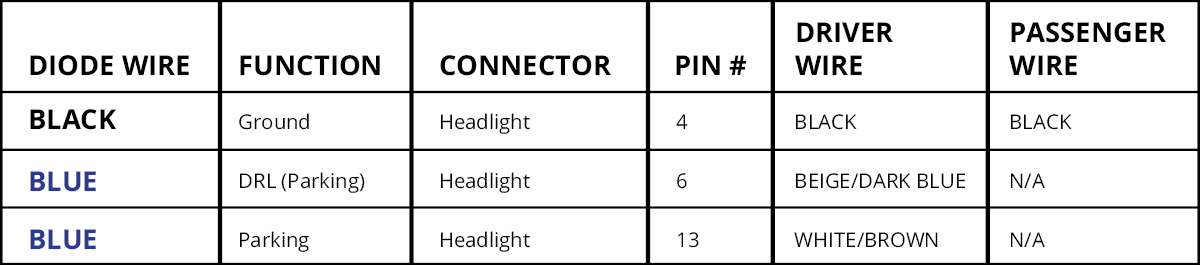
Connect the controller to the SolidState Relay Harness. Run the battery input wire to the battery and connect to the positive and negative terminals. Tap the black wire to ground and the two blue wires from the relay harness to your power sources on one side of the vehicle per the included wiring diagram. Mount drivers, controller, and relay outside the headlight for serviceability, away from the engine block. Test thoroughly, reseal the headlight, and reinstall onto the vehicle. The install is complete.
Questions About the Install?
If you run into any issues during the installation, contact Ess K Customs — as an authorized Diode Dynamics dealer, we're here to help.
Shop Ram Lighting at Ess K Customs
Looking for lighting upgrades for your 2019-2023 Ram 1500? As an authorized Diode Dynamics dealer, Ess K Customs carries genuine products with full manufacturer warranty.
Browse Ram RGBW LED Boards at Ess K Customs →
This install guide applies to Diode Dynamics SKU: DD2255