
The HD LED Halos for the 2016-2018 GMC Sierra 1500 replace the factory LED boards with brighter, more uniform circuit boards that align perfectly behind the factory diffusing reflector. Available in switchback and amber-only versions, both also function as an additional front turn signal for a custom yet functional look. Here's the full walkthrough.
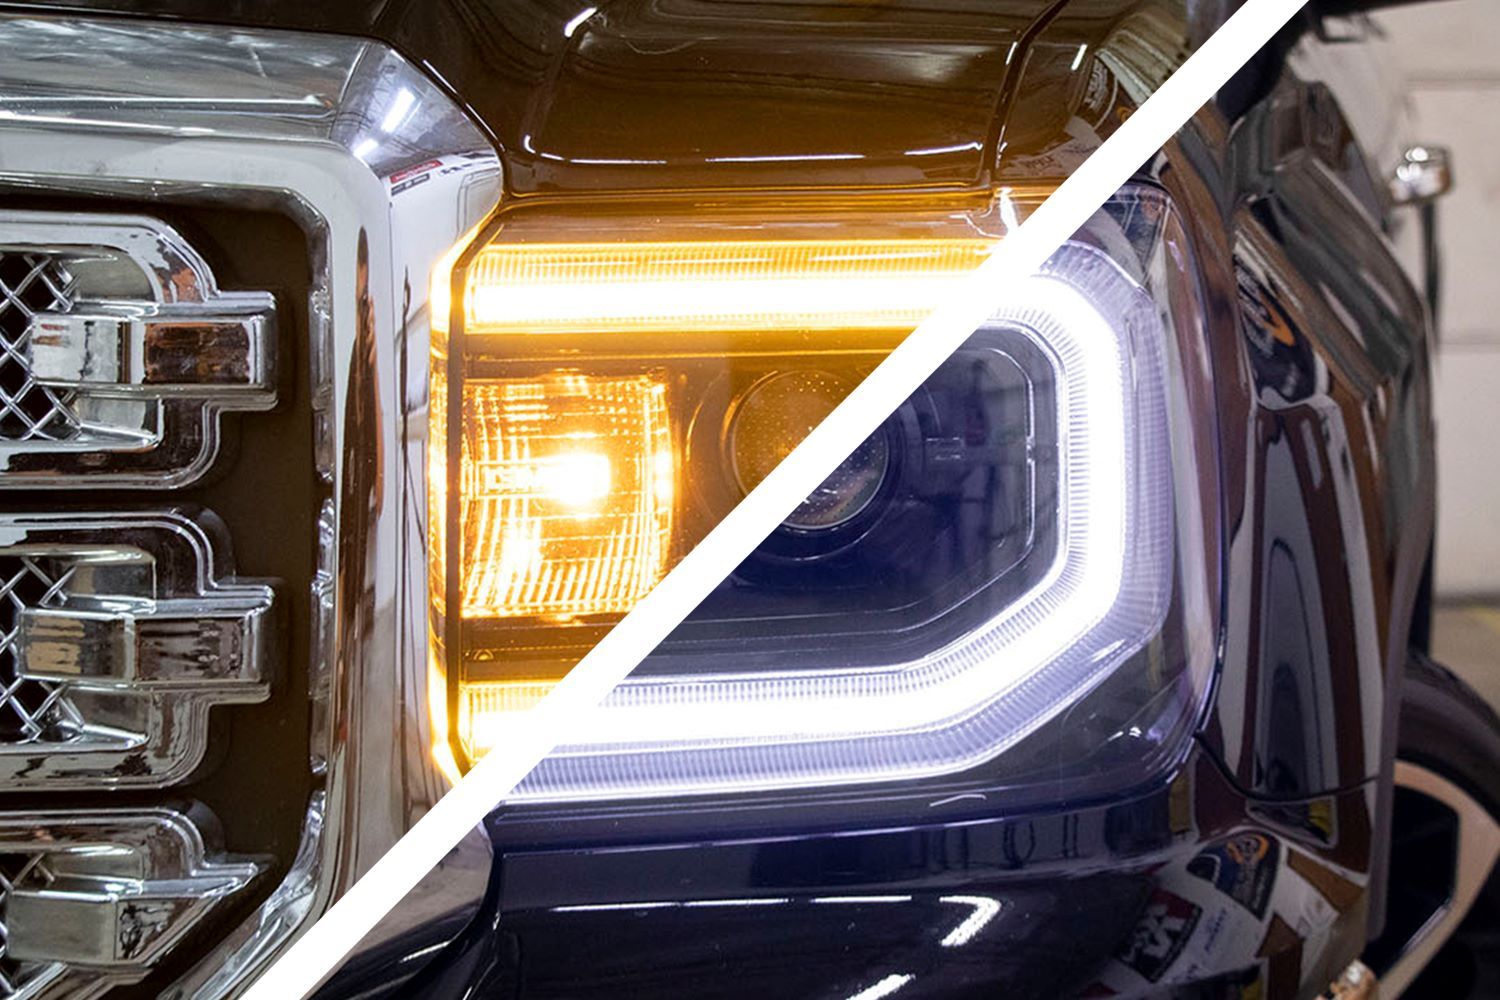
Table of Contents
- Installation Video
- Tools Required
- Installation Instructions
- Wiring Instructions
- Questions About the Install?
- Shop Sierra Lighting at Ess K Customs
Important: Headlights must be opened before proceeding with installation. Professional installation is strongly recommended.
Installation Video
Tools Required
- Phillips screwdriver
- Double-sided adhesive or epoxy
Installation Instructions
Step 1 — Remove the HID Ballast
Before opening the headlight, remove the three Phillips screws holding the HID ballast in place and four Phillips screws around the edge of the headlight. Then remove the HID ballast.
Step 2 — Remove the Silver Bezel
After the headlight has been opened, remove the four Phillips screws holding the silver bezel in place. Remove the bezel and set it aside on a soft surface.
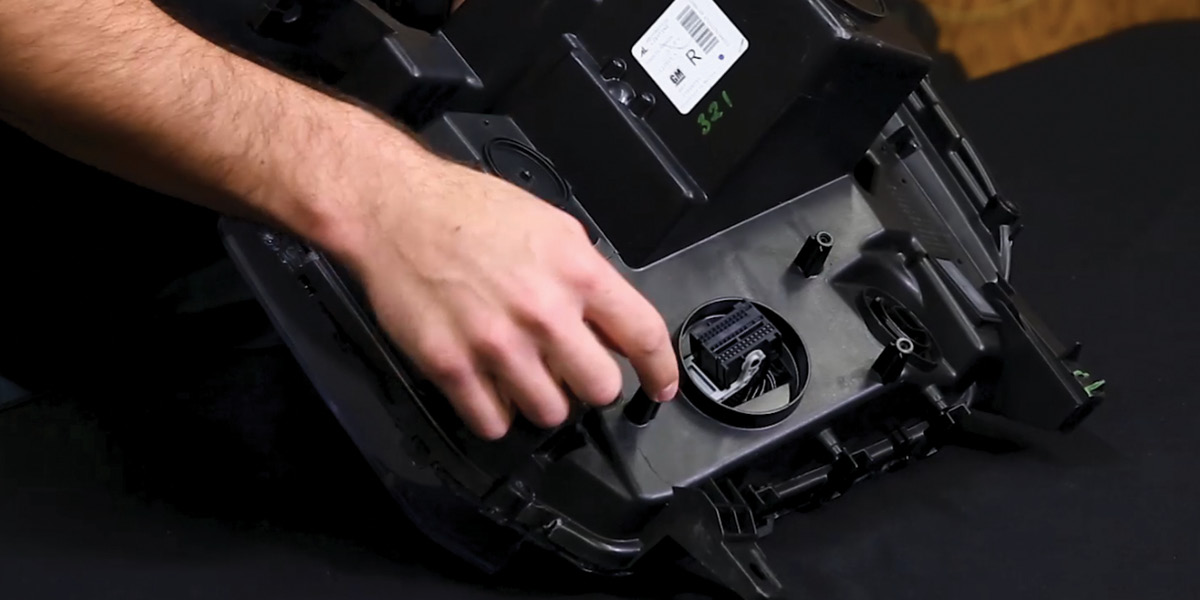
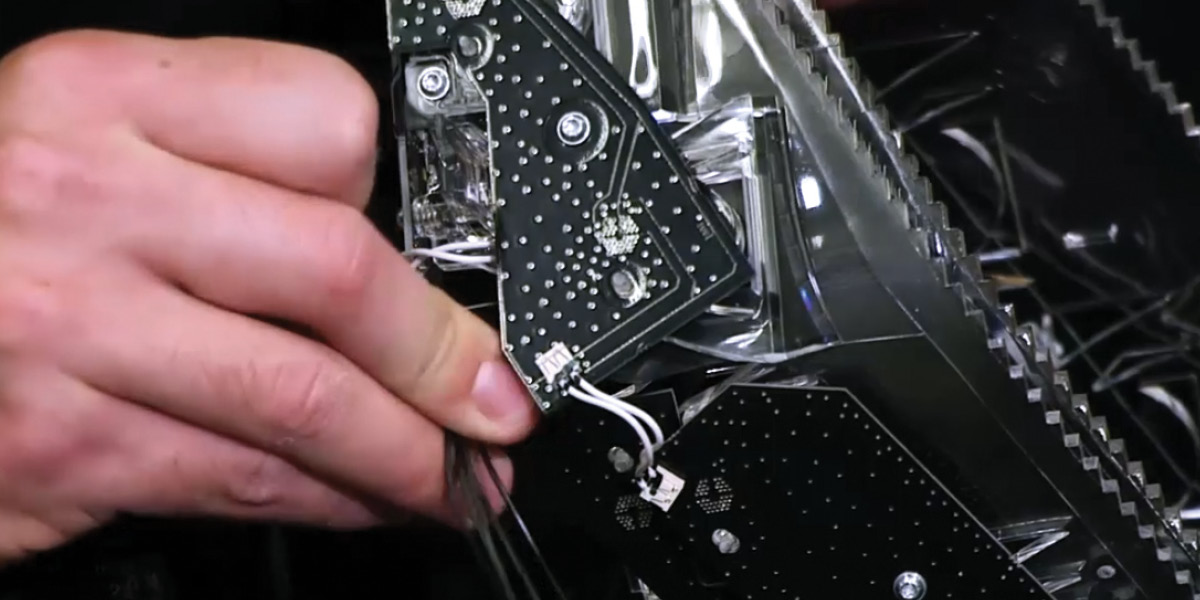
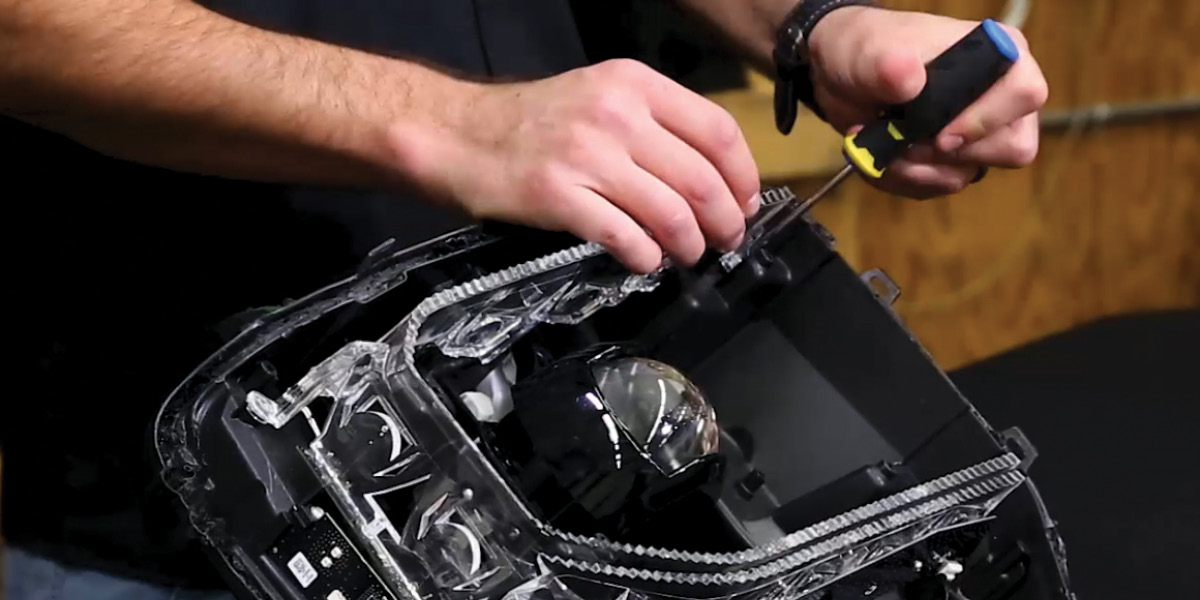
Step 3 — Remove the Factory Optic
Remove the four Phillips screws holding the factory optic assembly in place, then disconnect the two factory board connectors. These connectors won't be reused — tuck them out of the way.
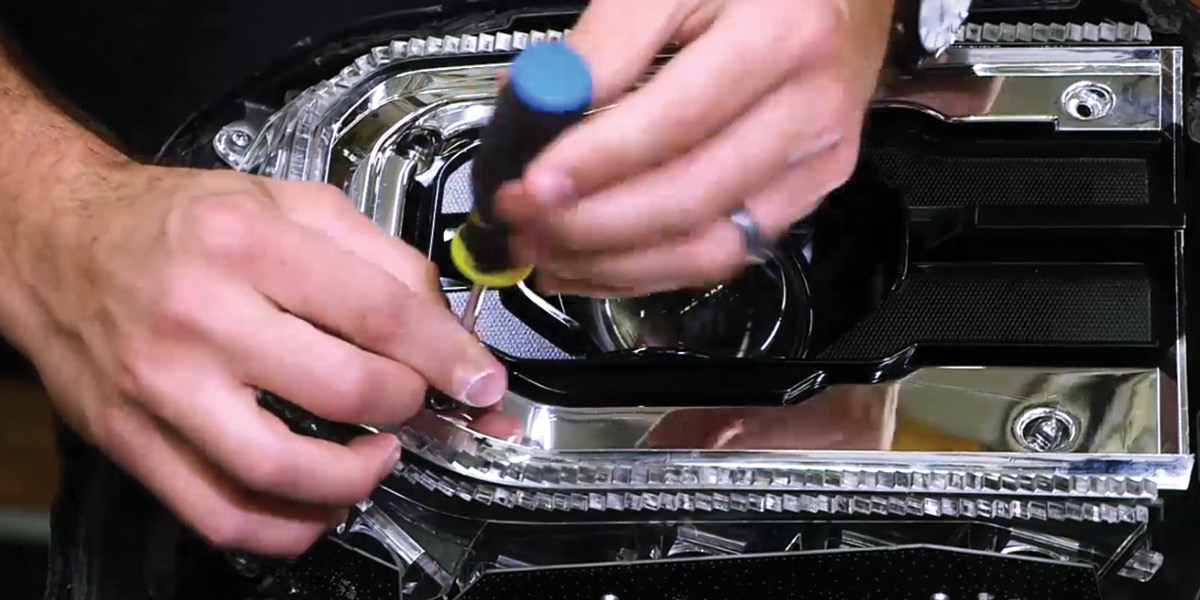
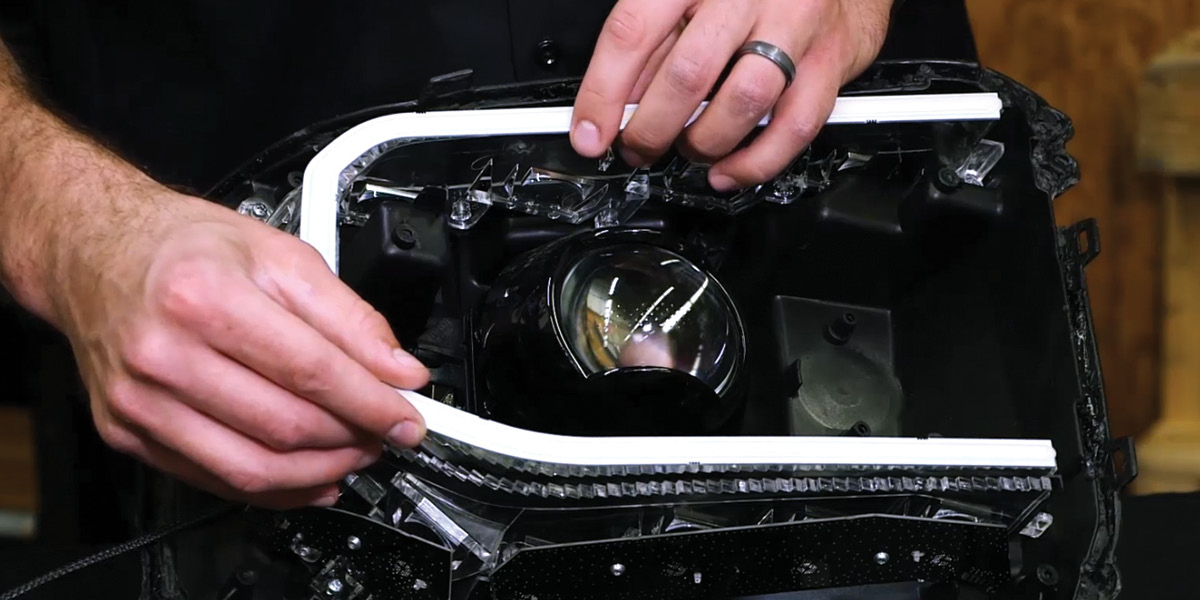
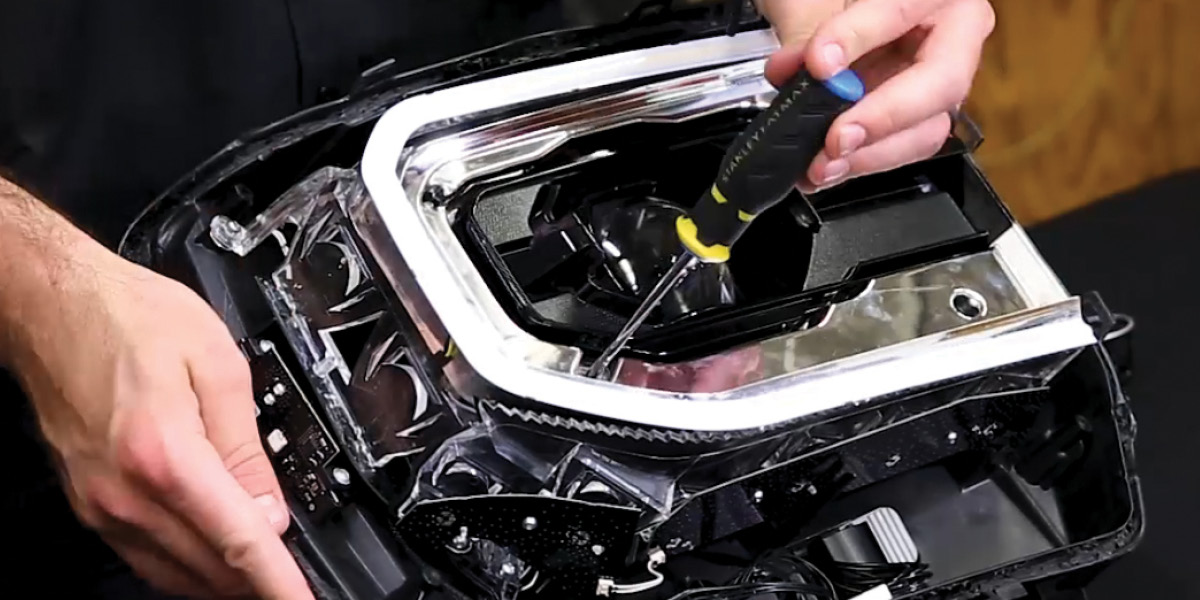
Step 4 — Reinstall the Factory Optic and Position the Halo
Reinstall the factory optic assembly using the original screws. Place the new LED Halo on top of the factory optic assembly and secure it using double-sided adhesive or epoxy applied evenly around the halo. Route the wire outside of the headlight, sealing any holes you create. Reinstall the silver bezel using the original screws. Repeat for the other headlight.
Wiring Instructions
Step 5 — Connect the HD Halo
Connect the halo connector to the Switchback driver output. Connect the Switchback driver input to the pigtail. Tap the pigtail wires to the wiring harness per the included wiring diagram. The black wire must be grounded before any function will work.
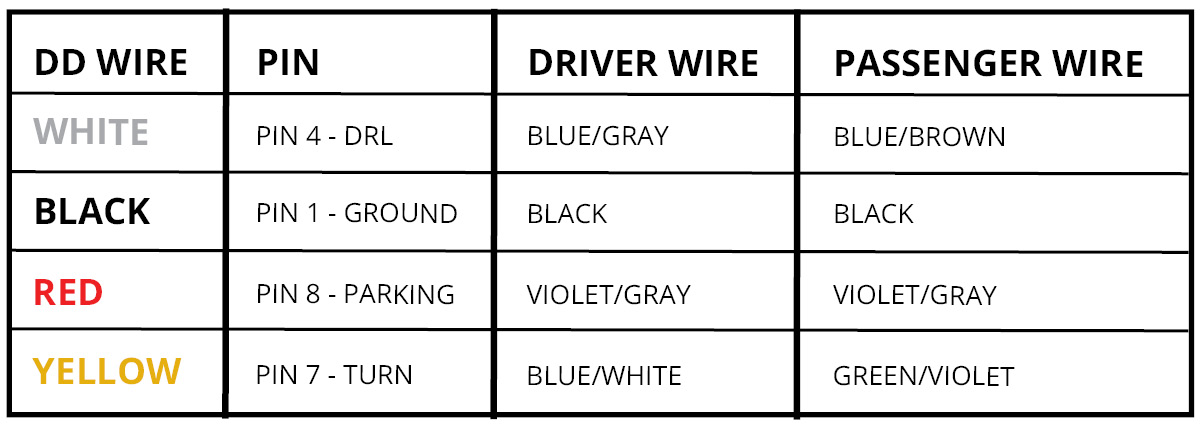

Important: Do NOT plug the LED panel directly into the pigtail without the driver. The LEDs must be connected to the driver first to control power.
Step 6 — Mount the Driver and Reinstall
Mount the driver outside the headlight for serviceability, in a location away from the engine block to avoid excessive heat buildup. Tuck all wires. Test thoroughly, reseal the headlight, and reinstall onto the vehicle. The install is complete.
Questions About the Install?
If you run into any issues during the installation, contact Ess K Customs — as an authorized Diode Dynamics dealer, we're here to help.
Shop Sierra Lighting at Ess K Customs
Looking for lighting upgrades for your 2016-2018 GMC Sierra 1500? As an authorized Diode Dynamics dealer, Ess K Customs carries genuine products with full manufacturer warranty.
Browse Sierra HD LED Halos at Ess K Customs →
This install guide applies to Diode Dynamics SKUs: DD2177, DD2240